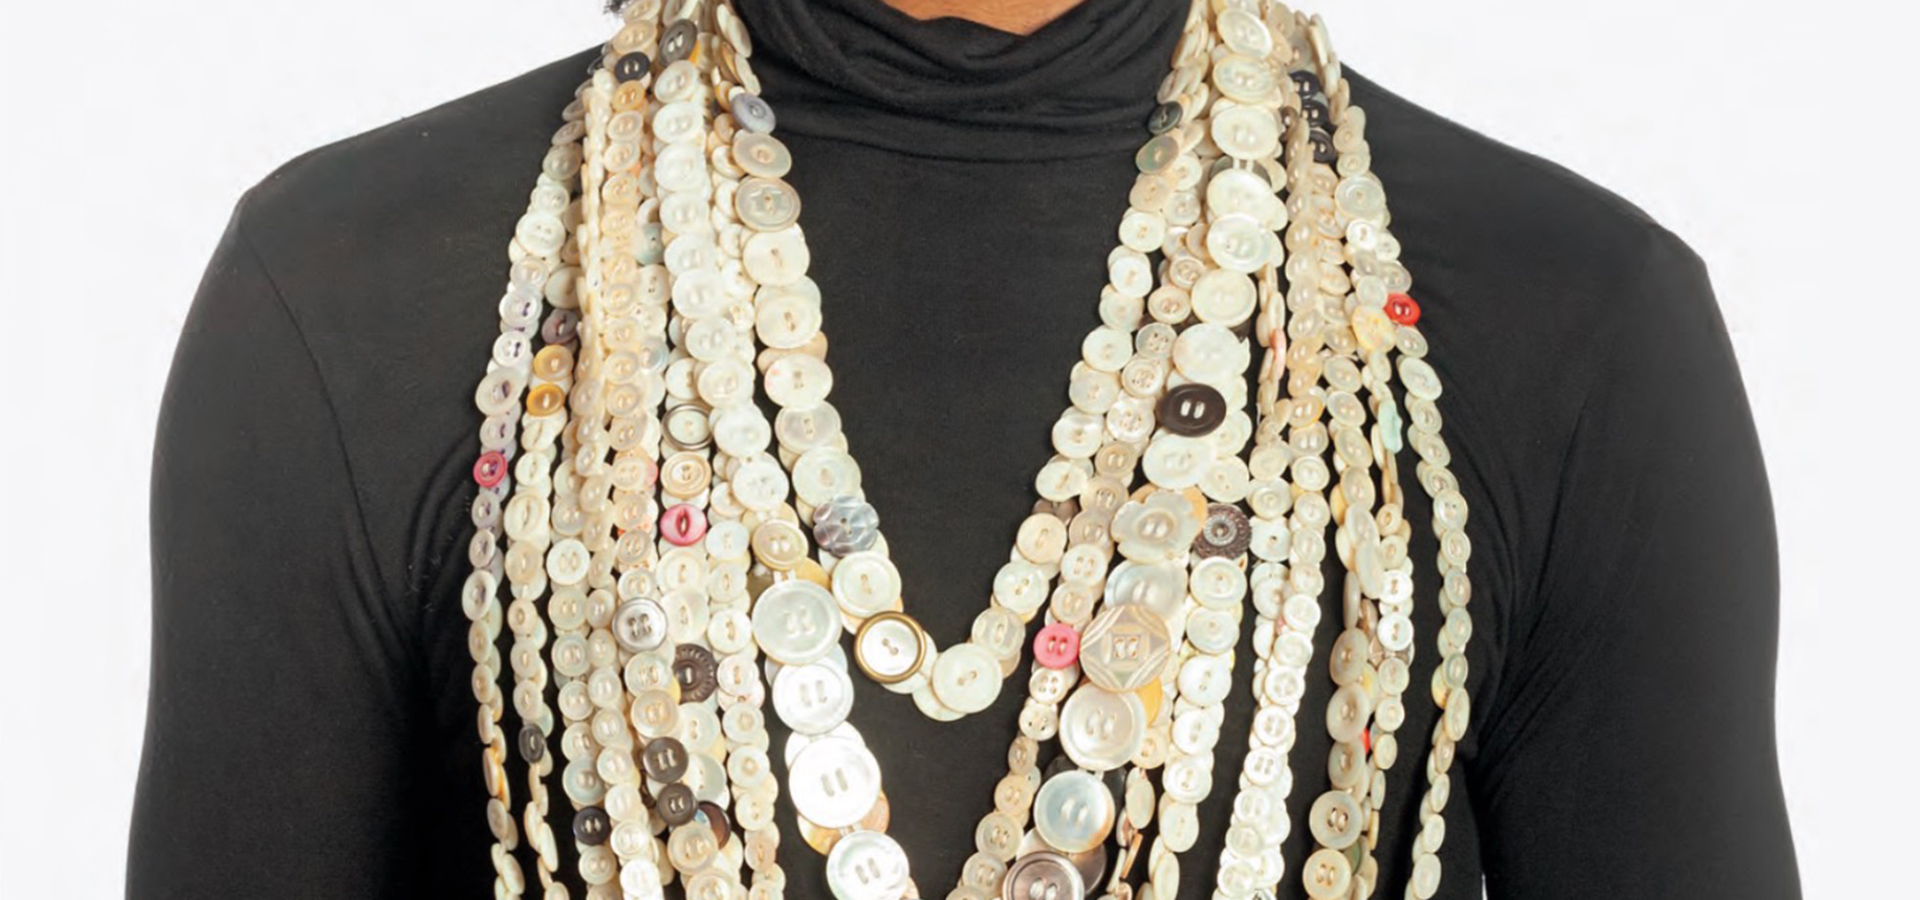
Beau McCall: A Button Necklace
RECOMMENDED AGE LEVEL
5+ with adult supervision
Hazards: Scissors, needles, buttons (choking hazard)
PROJECT DESCRIPTION
Nearly forty years ago, Beau McCall began his career in New York City’s Harlem neighborhood with the Harlem Institute of Fashion. Since then, the artist has continued to transform buttons into wearable and visual art. His signature style of layered, overlapping buttons is present throughout his work and reflected in this unique necklace. Let Beau himself guide you as you create your own eye-catching wearable artwork and get your Buttons On! at home and beyond.
MATERIALS
- 115 two-hole buttons | Choose uniform buttons or various buttons of similar sizes.
- Sewing Needle | Make sure to test button hole size with sewing needle.
- Embroidery thread | Measure and cut 140” using a measuring tape.
- Scissors
INSTRUCTIONAL VIDEOS
INSTRUCTIONS
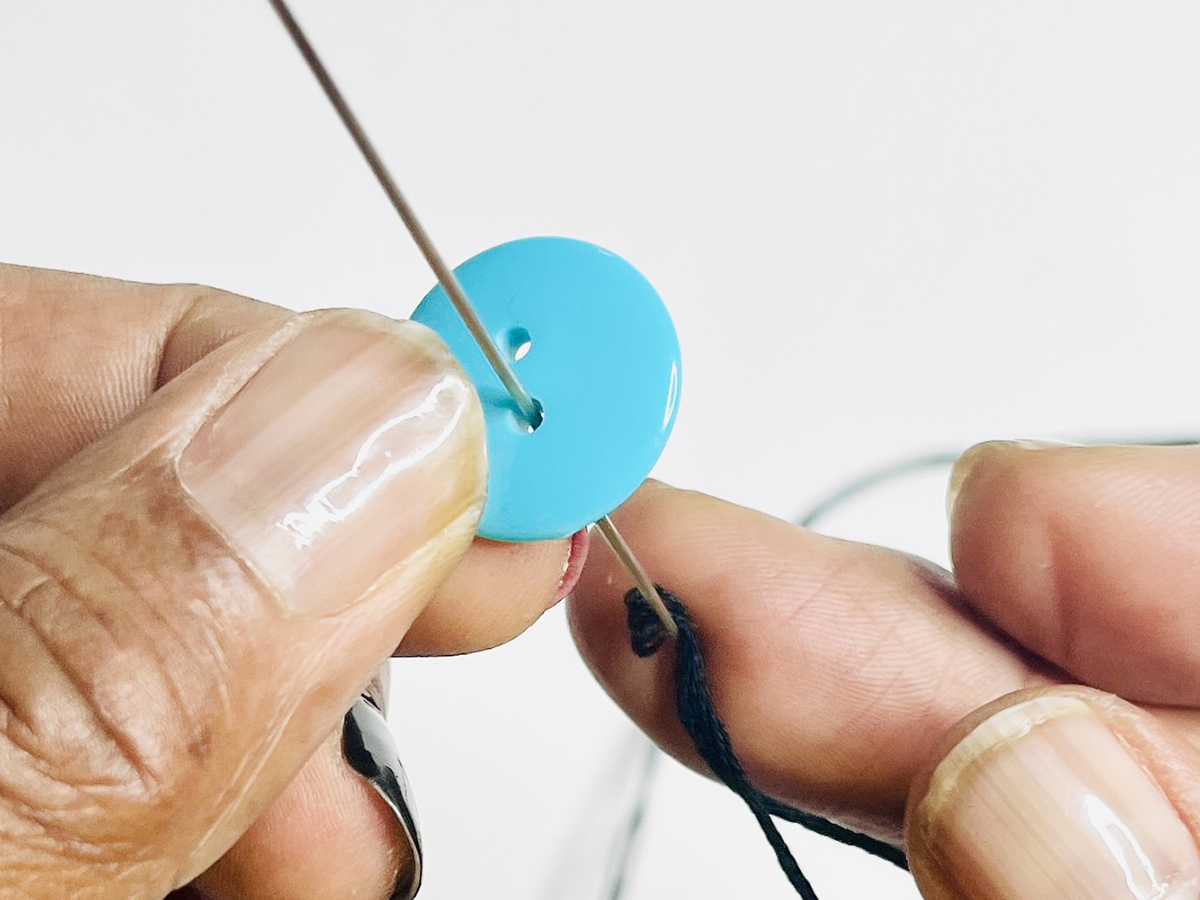
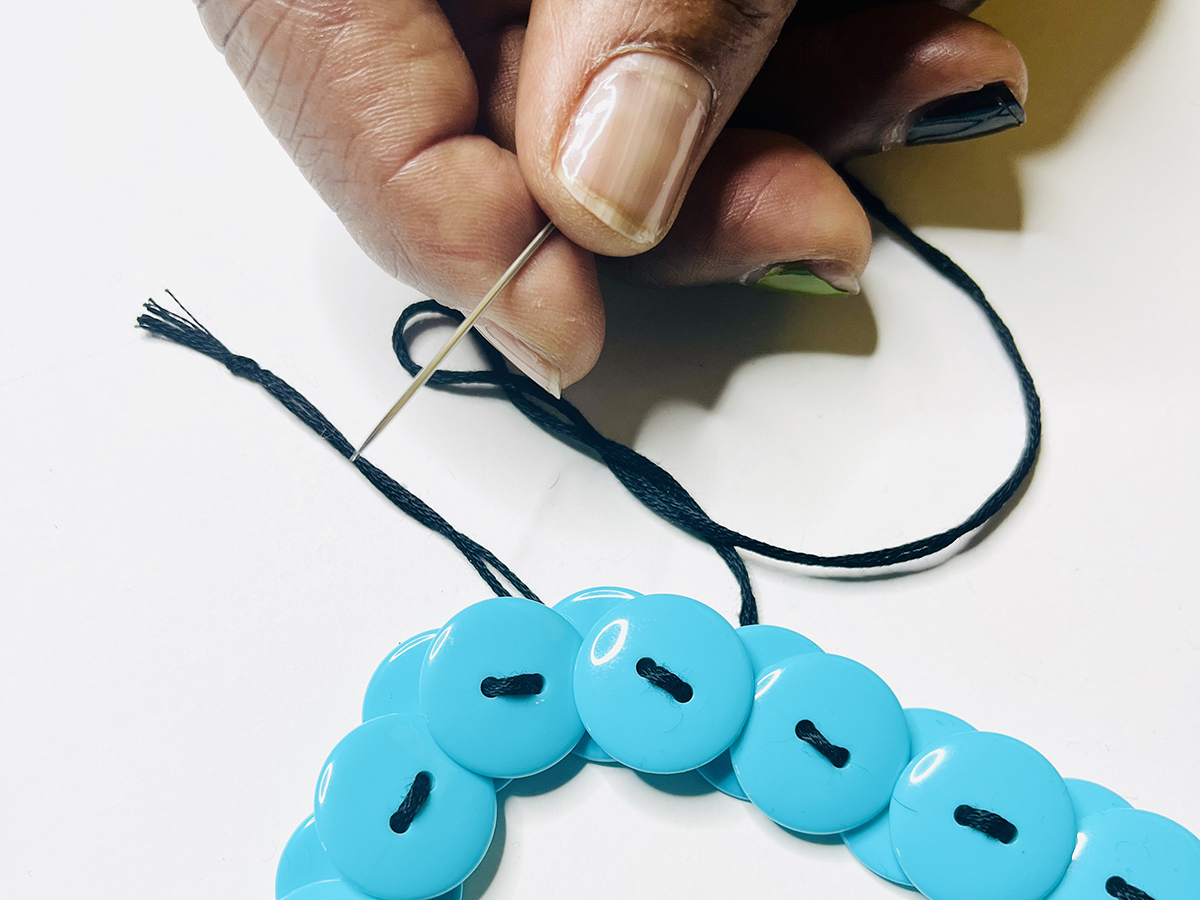
Step 1 – Thread the Needle
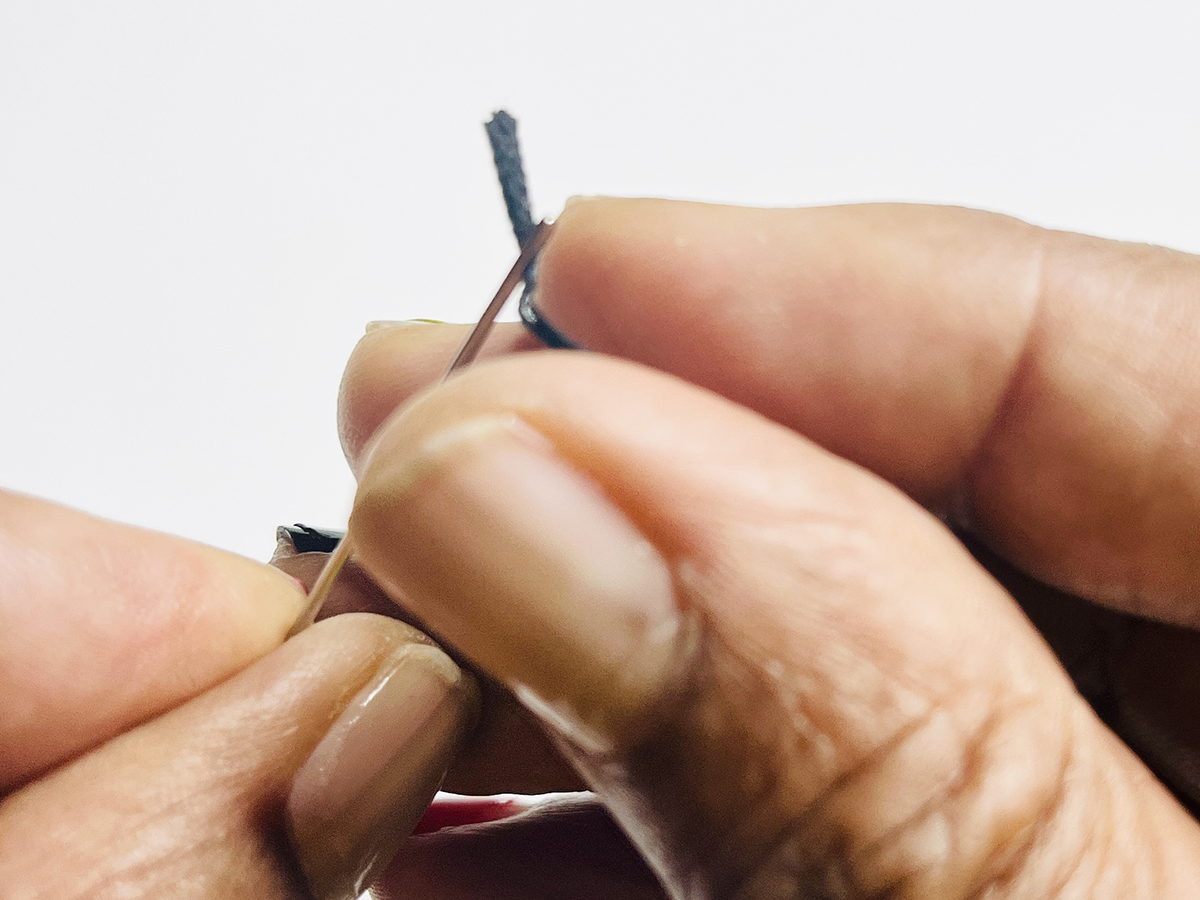

1. Thread needle and position it at embroidery thread midpoint.
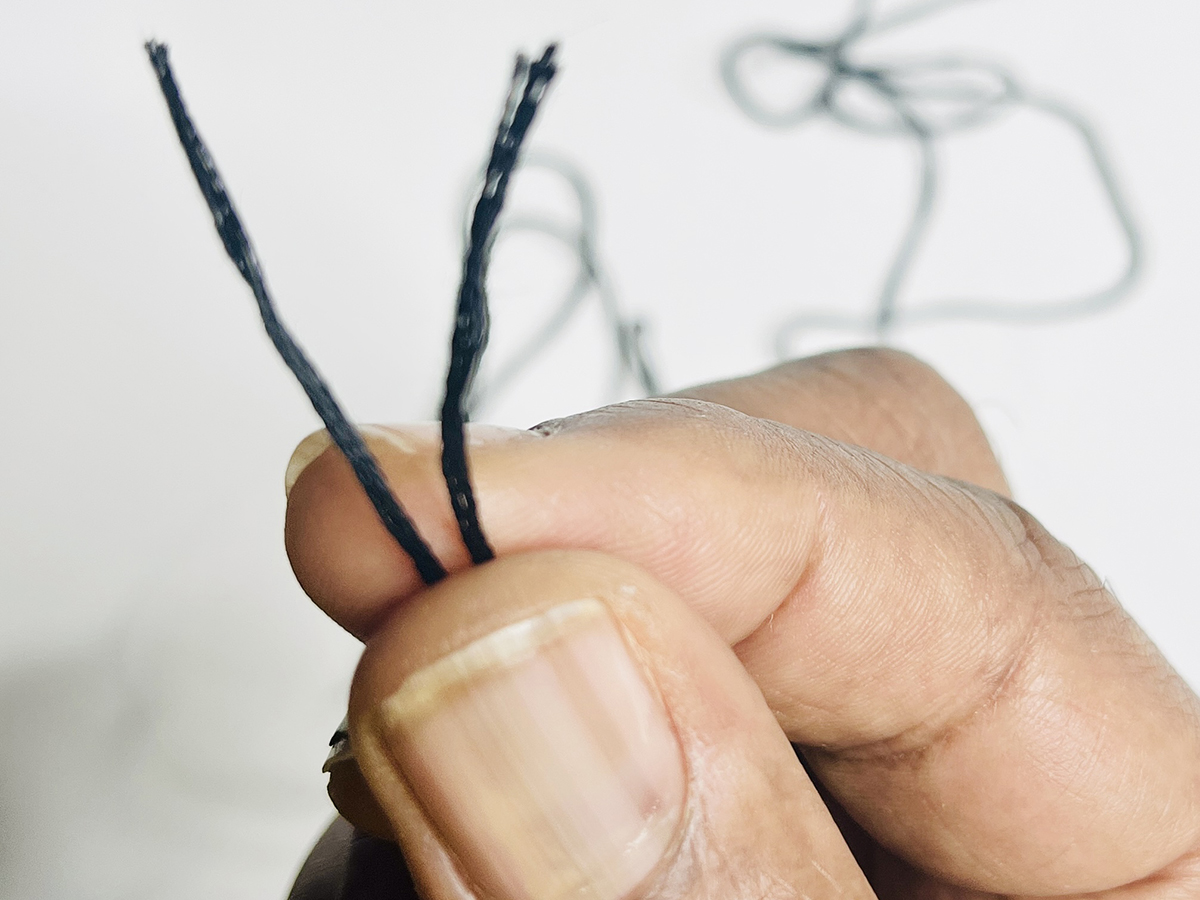
2. Pull the thread halves together so ends meet.
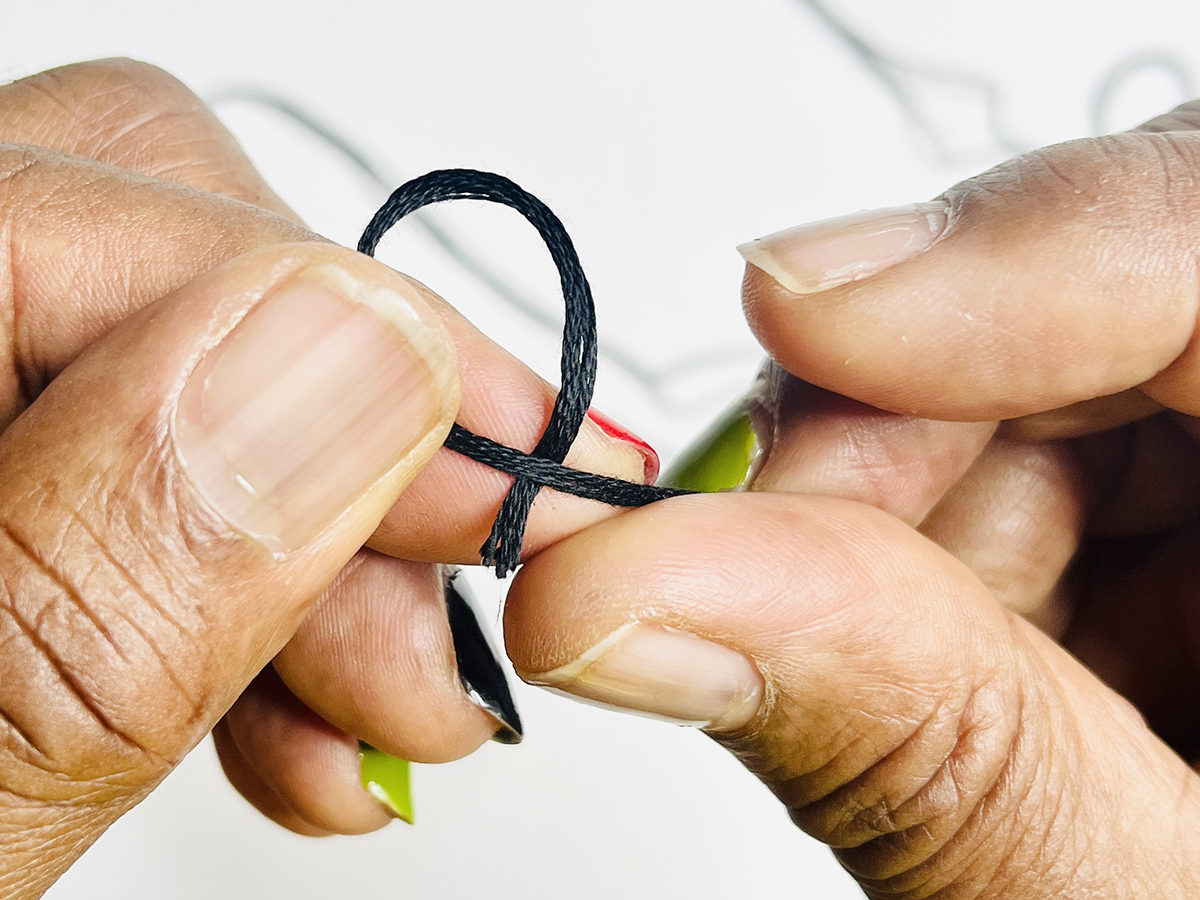
3. Loop the thread ends to make a knot and tie ends together.
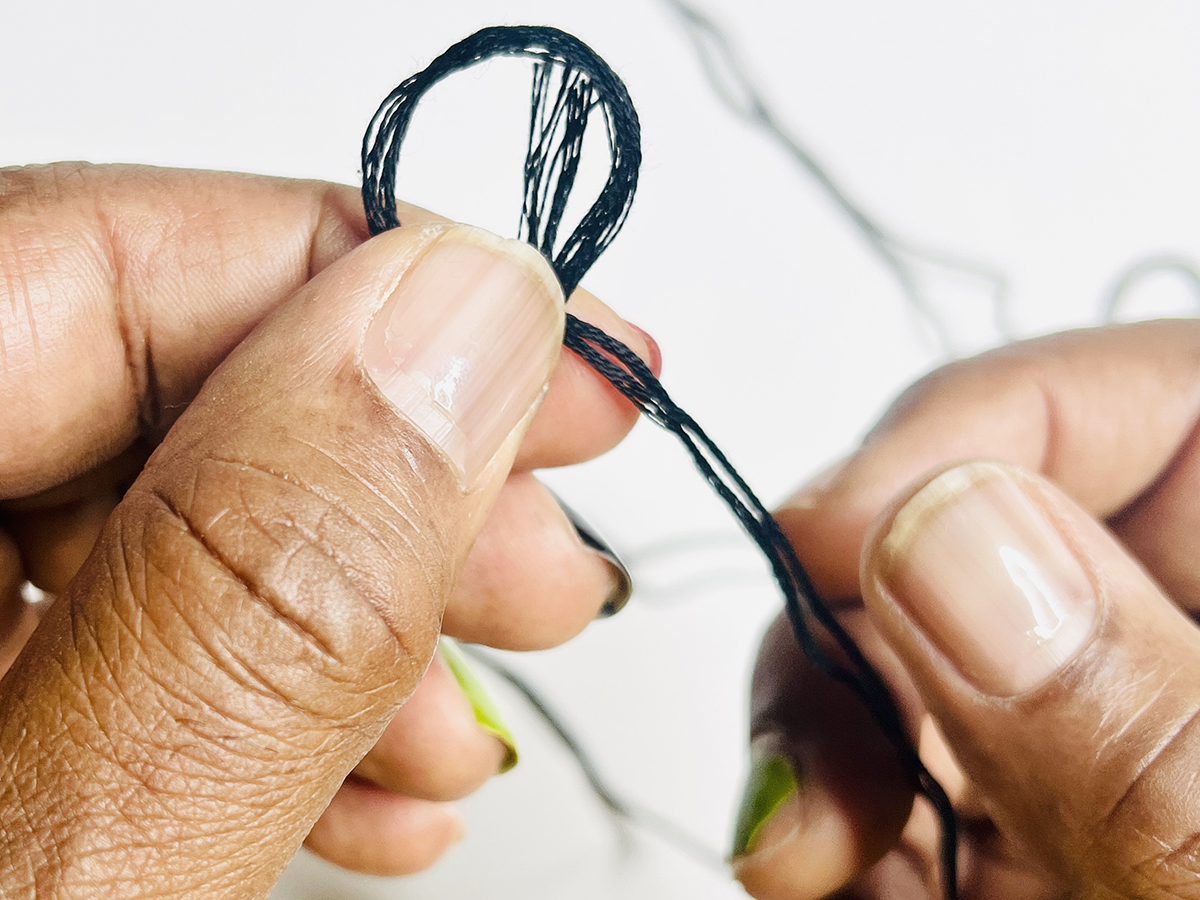
Step 2 – Add the First Button
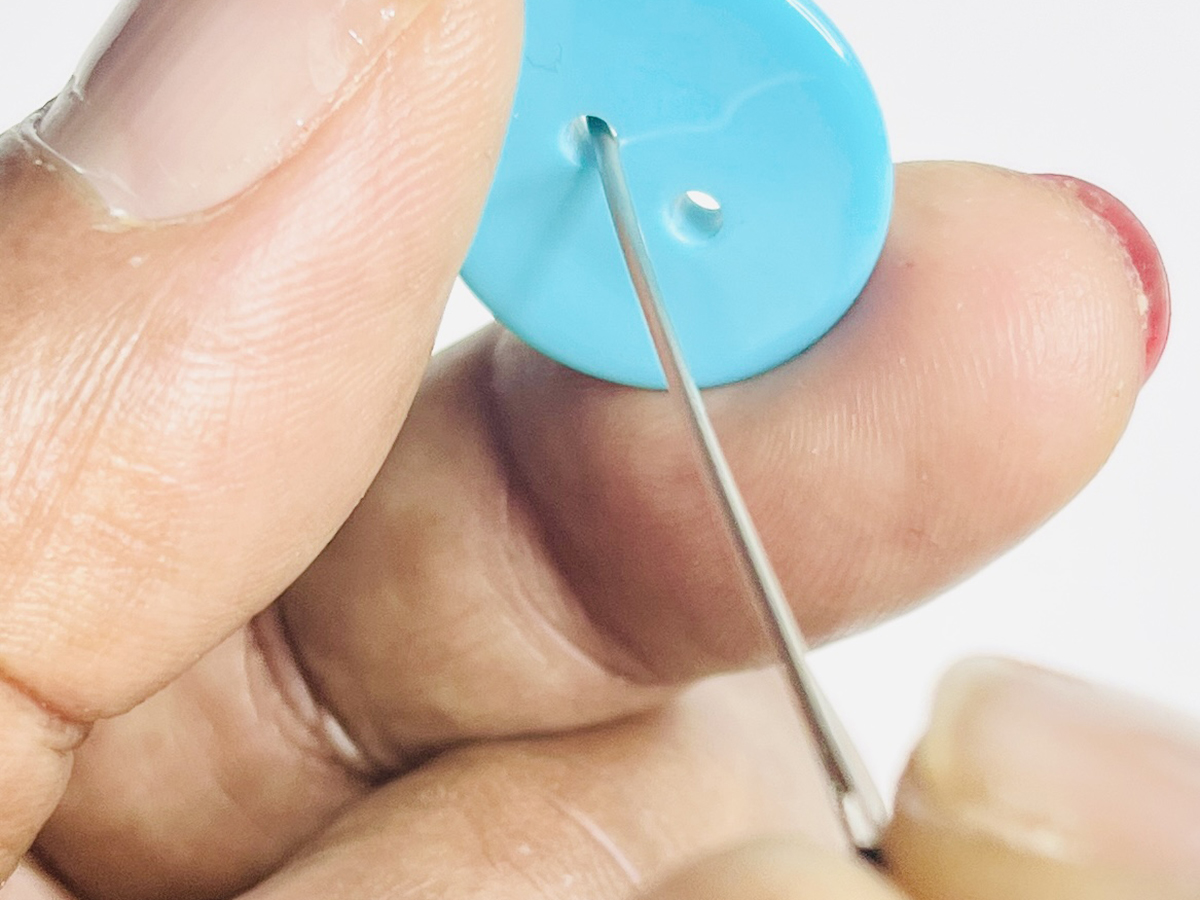
1. Place the needle through the first buttonhole.
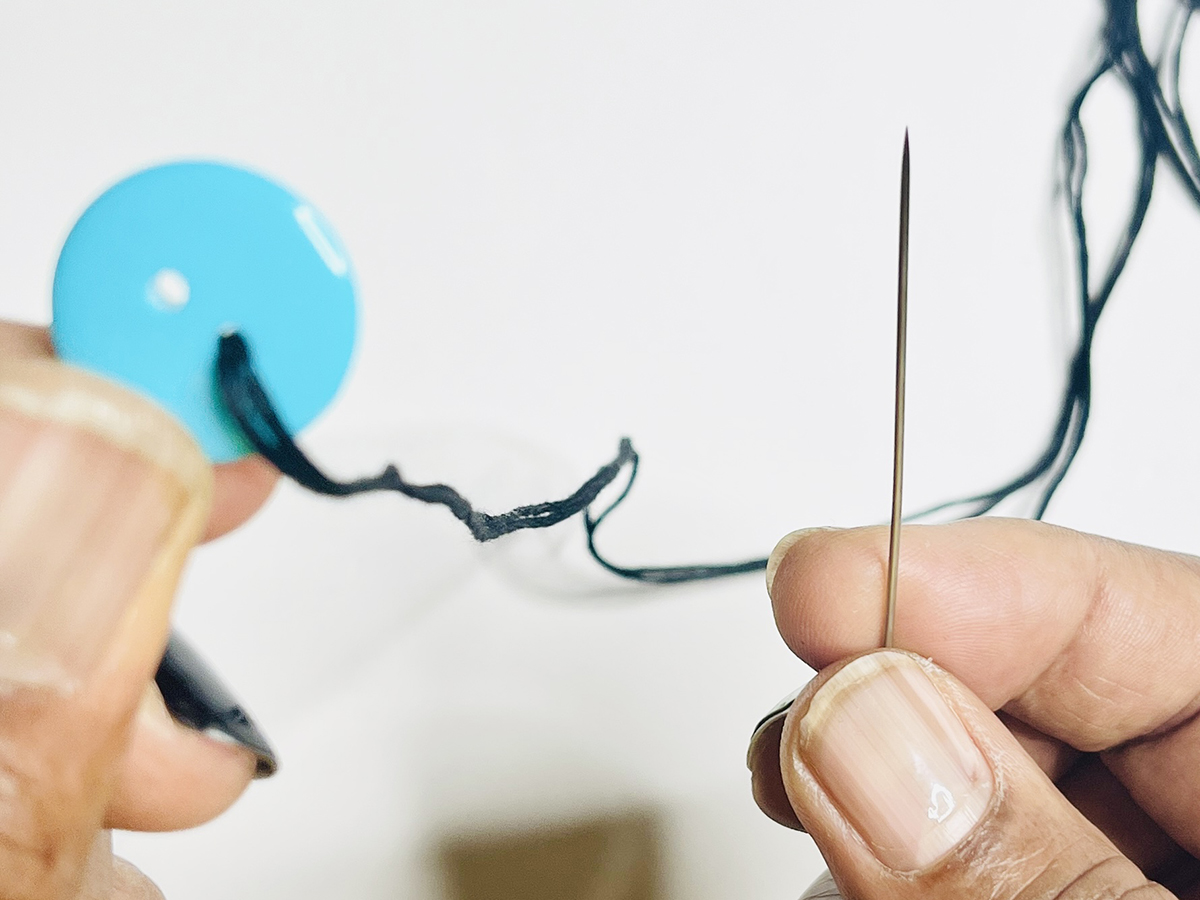
2. Pull embroidery thread partially through.
3. Stop about four inches before the knot, and leave a four-inch gap between the button and the knot.
4. Place the needle through the second buttonhole and pull.
Note: Needle Threading Orientation for Every Button
The needle should always be threaded from back to front for the first buttonhole and front to back for the second buttonhole throughout the entirety of the project.
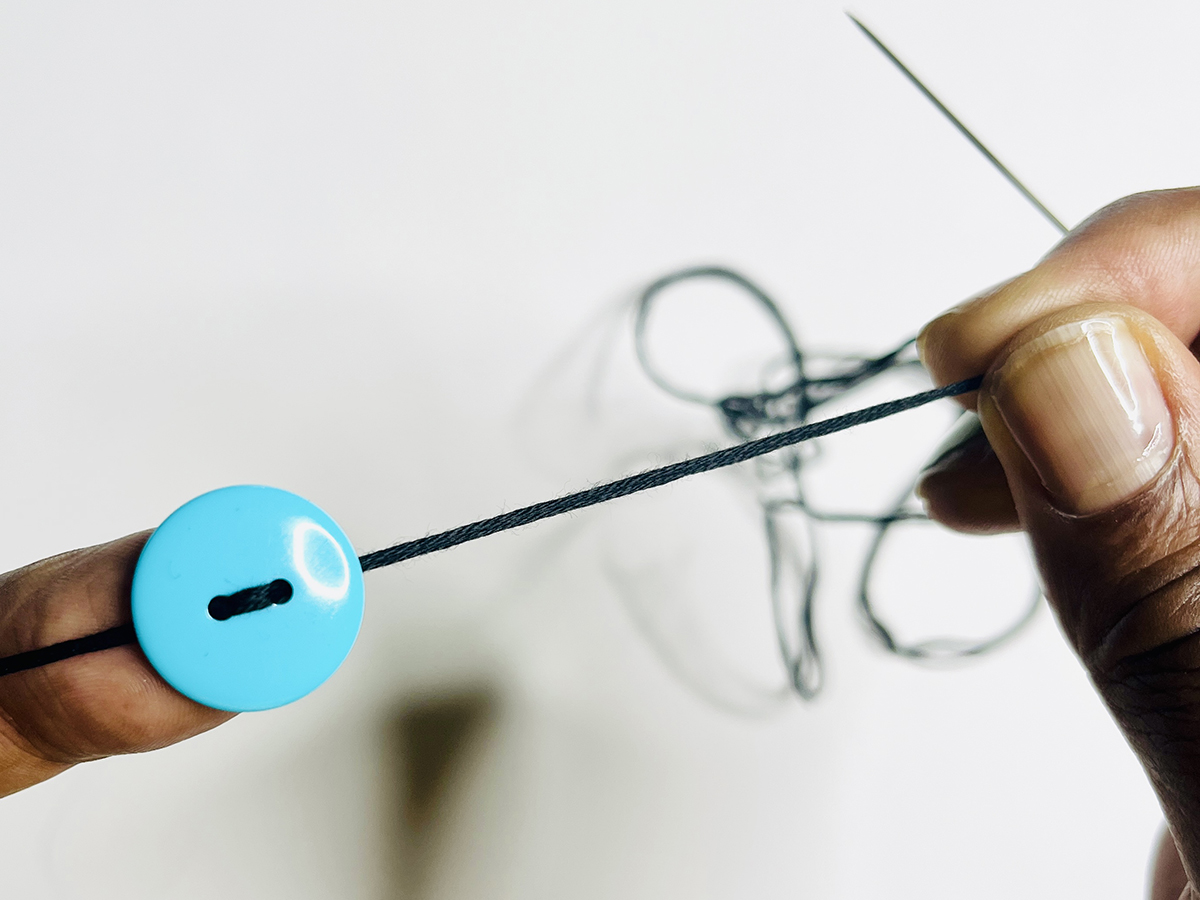
Step 3 – Secure the First Button in Place
1. Once again, place the needle through the first buttonhole – the hole on the shortest end of your thread. Pull the thread all the way through.
TIP: Keep a finger on the edge of the button to secure the button and thread.
2. Once again, place the needle through the second buttonhole. Pull thread to secure button in place.
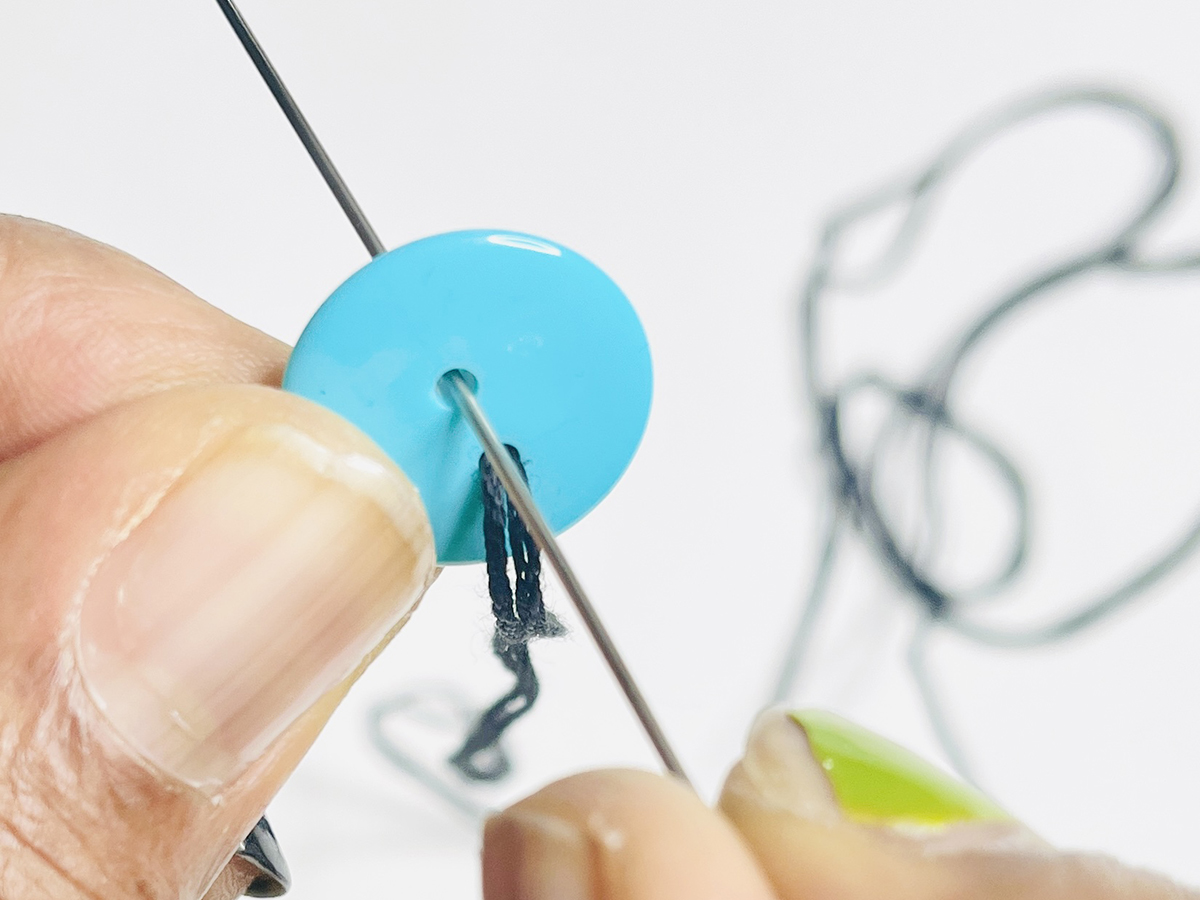
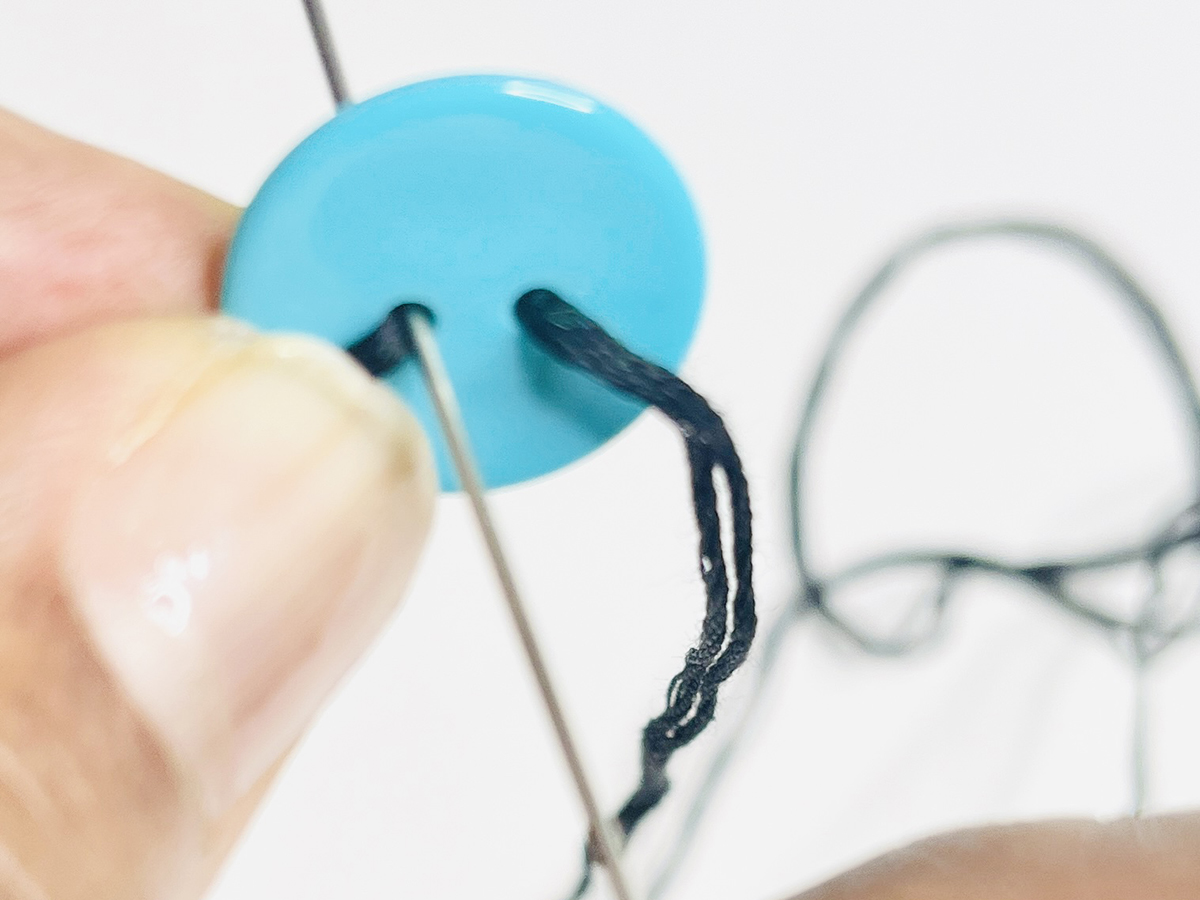
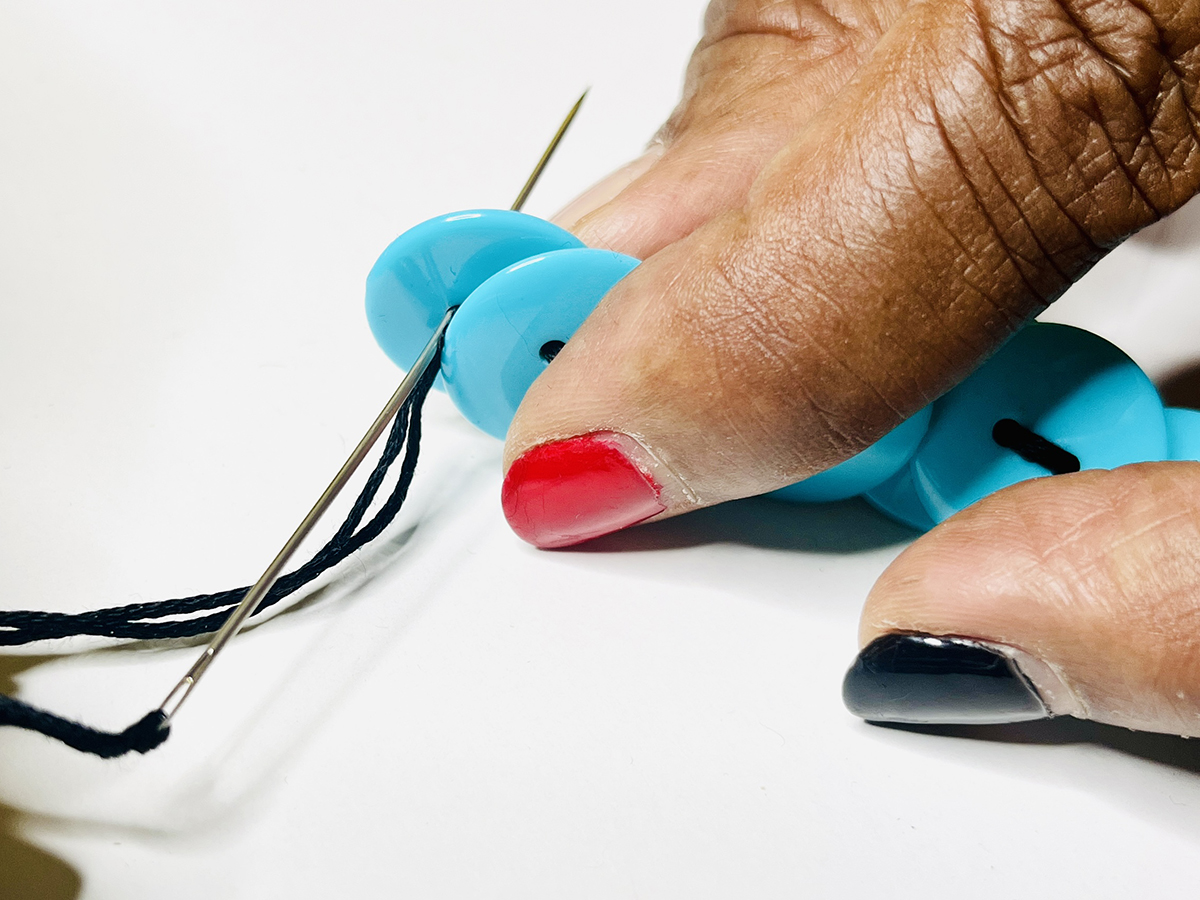
Step 4 – Thread Remaining Buttons
1. Place the needle through the first buttonhole.
2. Place the needle through the second buttonhole.
3. Pull embroidery thread through so the button is positioned next to the previous buttons.
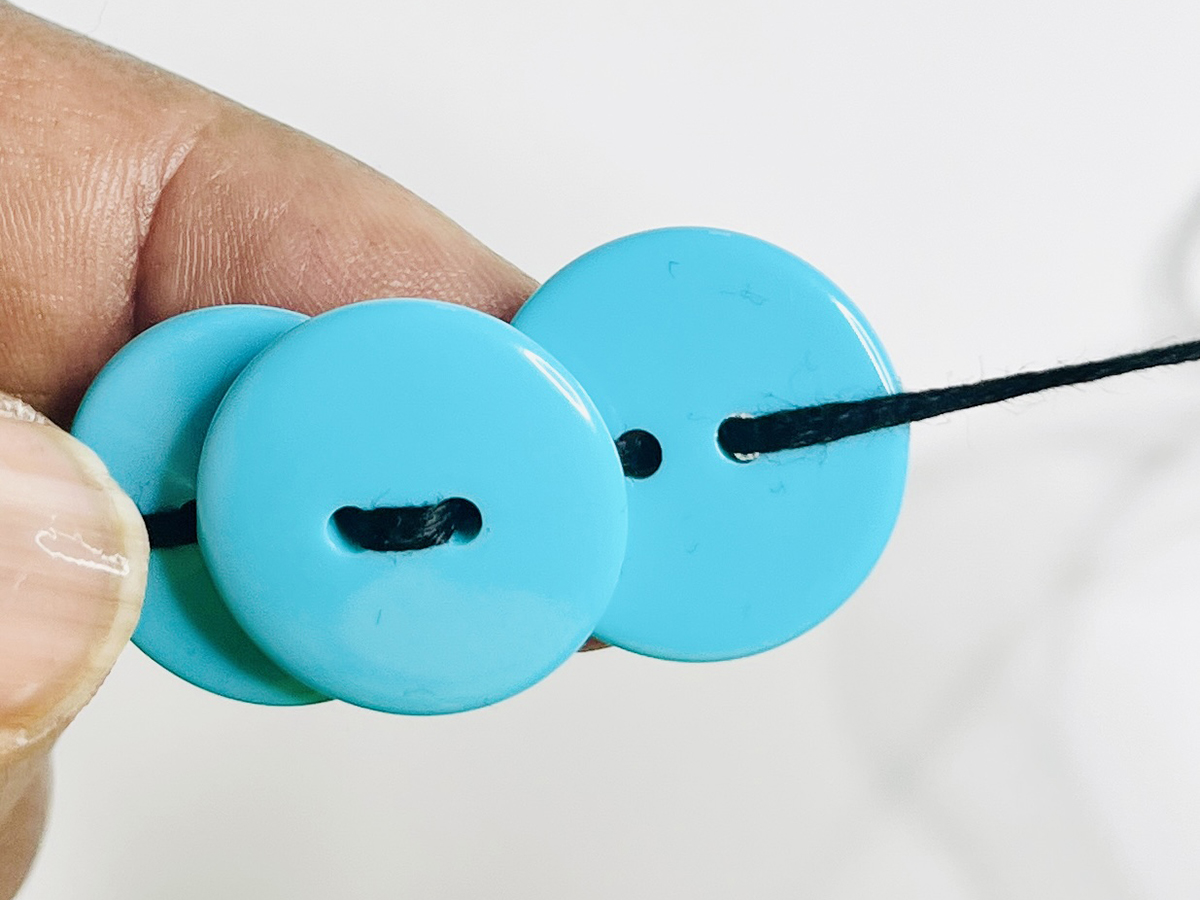
4. Repeat until all buttons are threaded
Note: Button Positioning
One end of the buttons should protrude on the top, and the other end should protrude on the bottom. Buttons should alternatively face down and up, overlapping in the same pattern throughout the necklace.
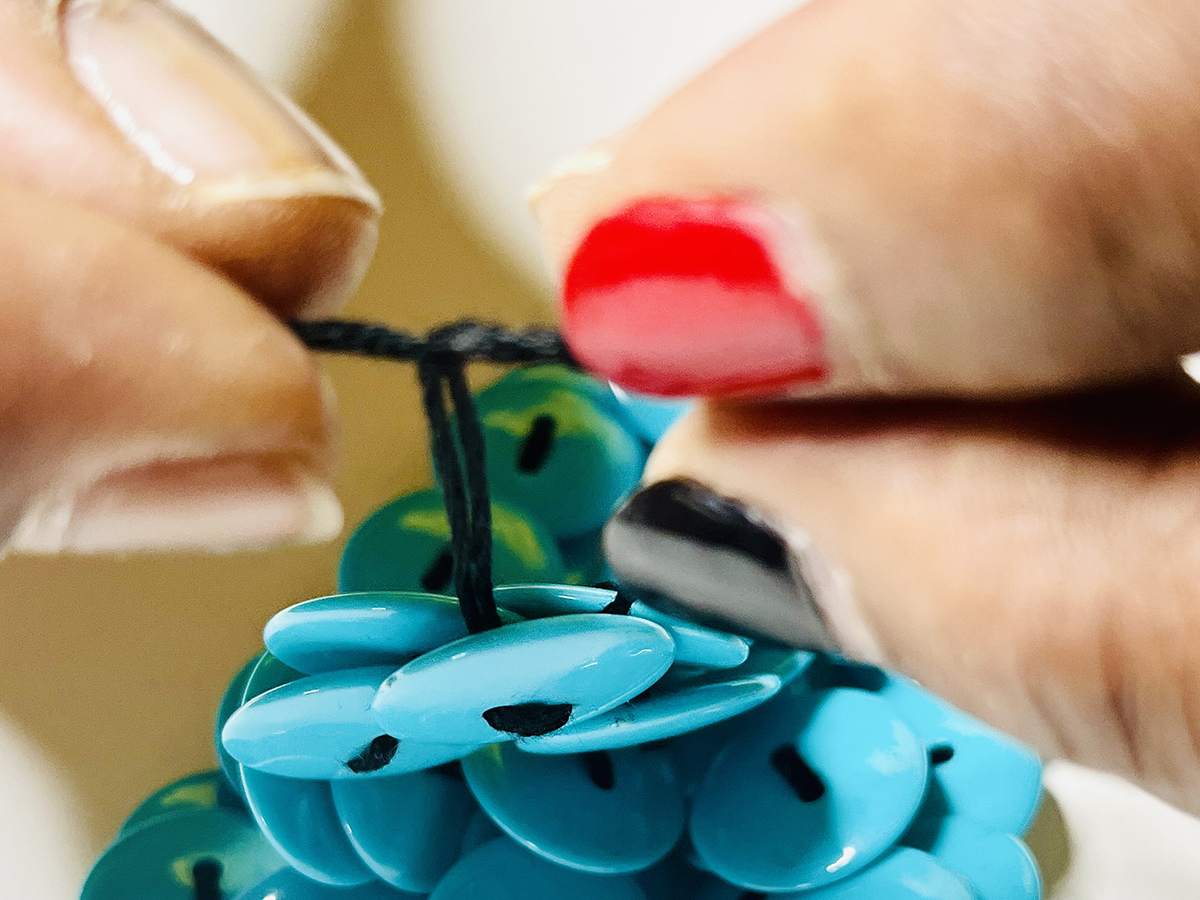
Step 5 – Verify Correct Button Positioning
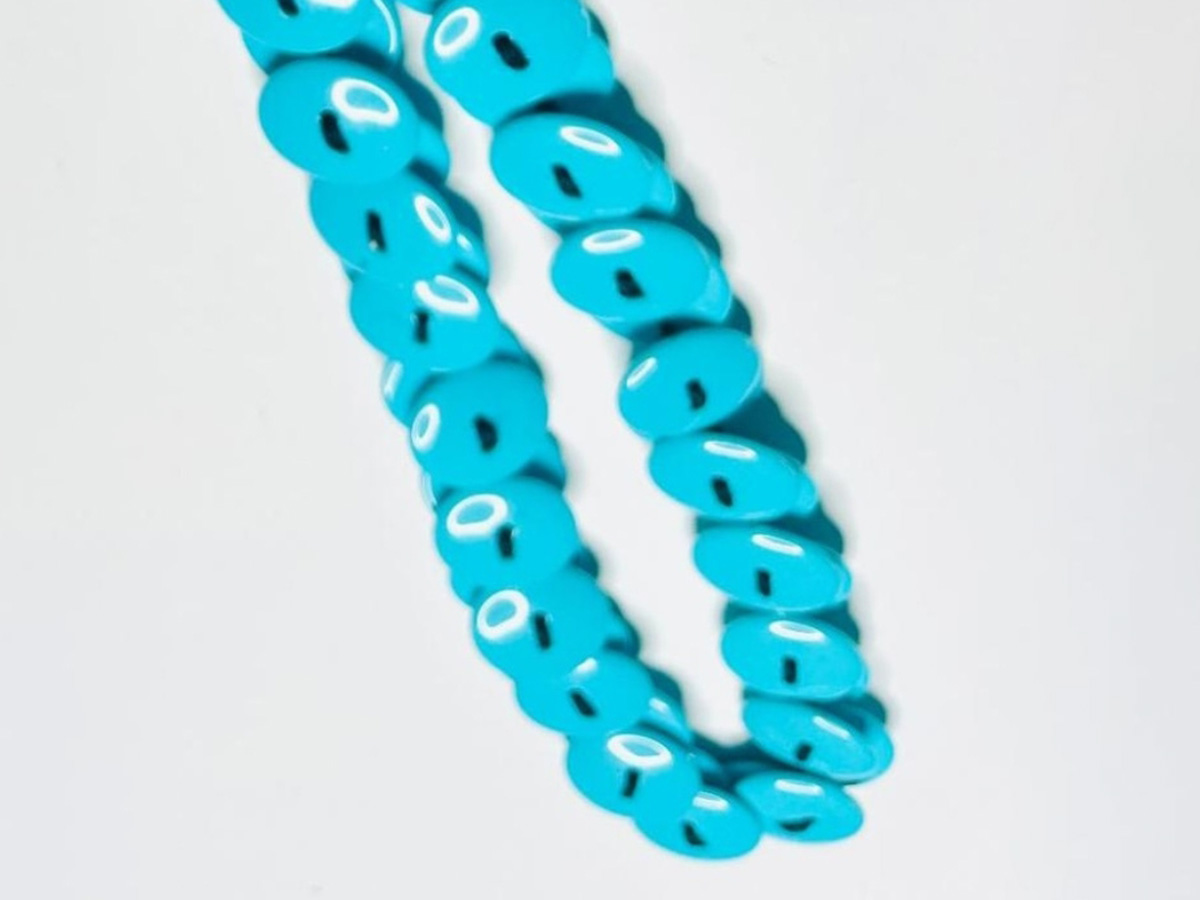
1. Lay the buttons flat so that each button overlaps in the same top/bottom pattern.
2. Reminder: One end of the buttons should protrude on the top, and the other end should protrude on the bottom.
3. Troubleshoot: If any section(s) of the buttons are not correctly overlapping, flip that section(s) of buttons to return to the pattern (top/bottom).
Do not move on to step 6 until button positioning is correct.
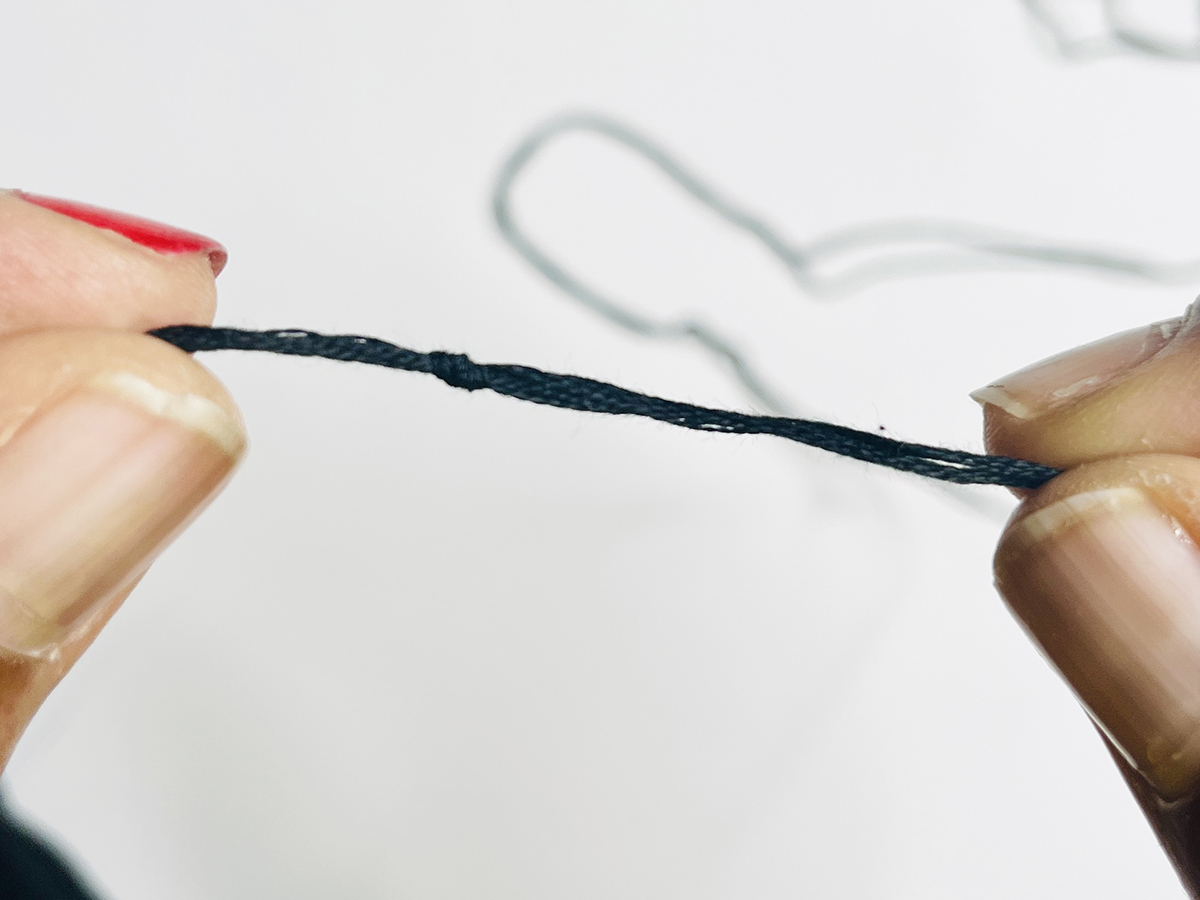
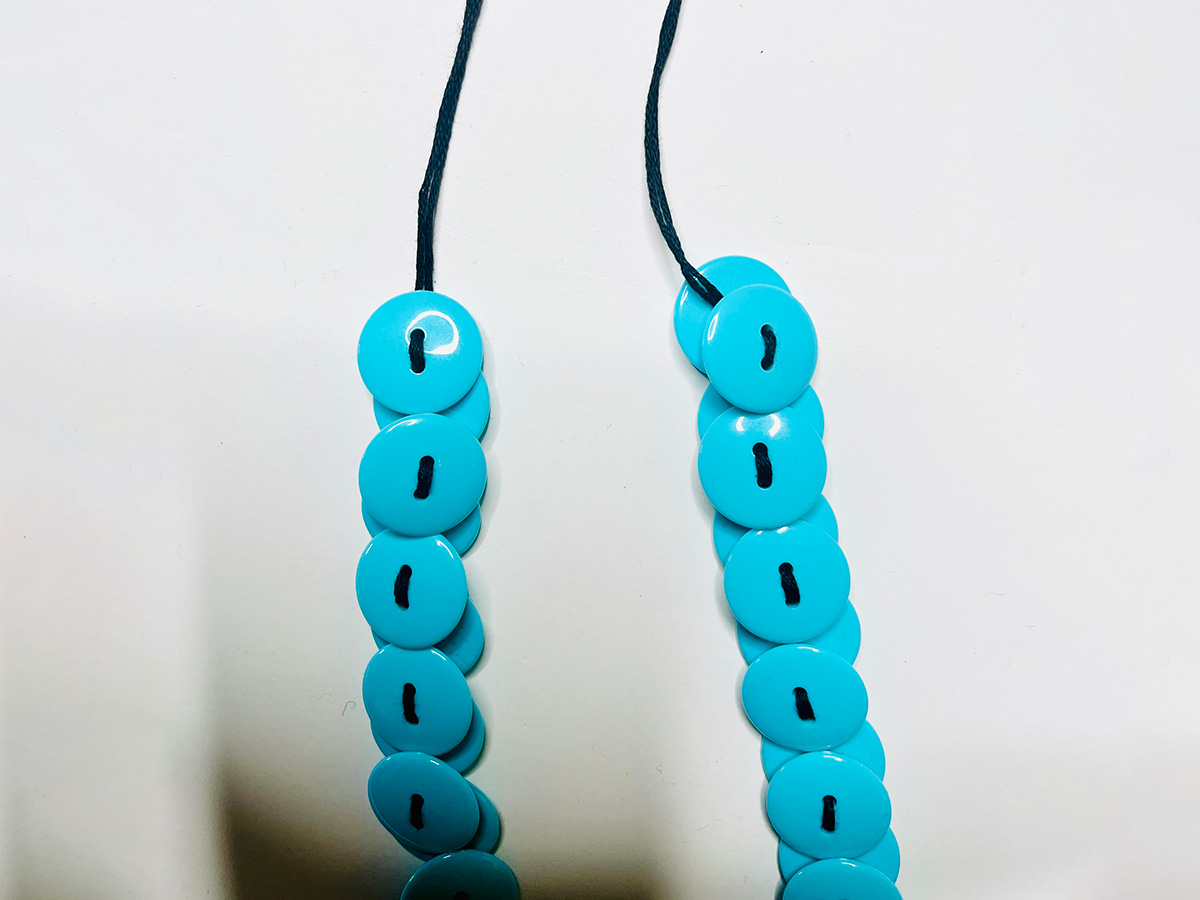
Step 6 – Join Necklace Ends Together
1. Place a needle through the first and second buttonholes of the original button.
2. Cut Both ends of the thread.

3. Trim the long end to ~ 7 inches.
4. Cut short the end right below the original knot.
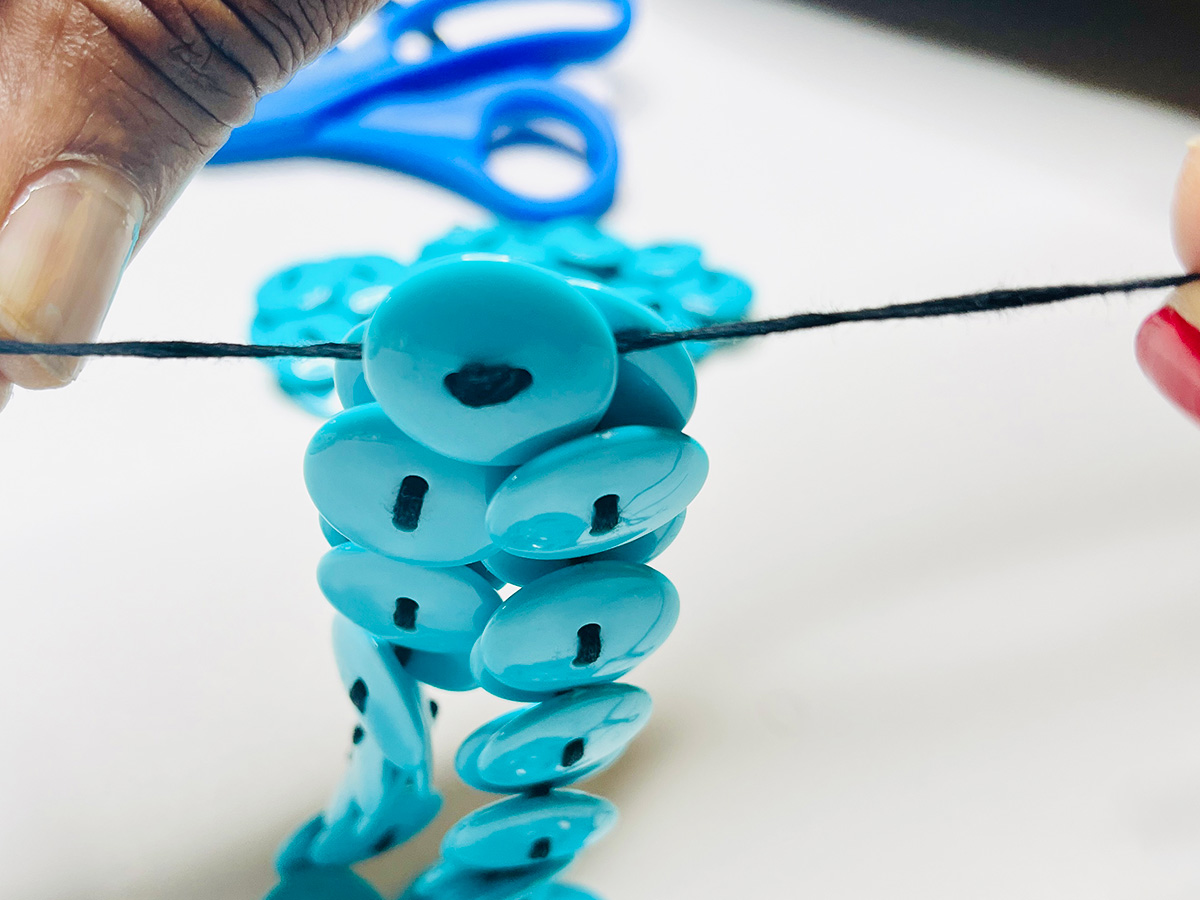
5. Tie the threads together using five knots to secure the necklace.
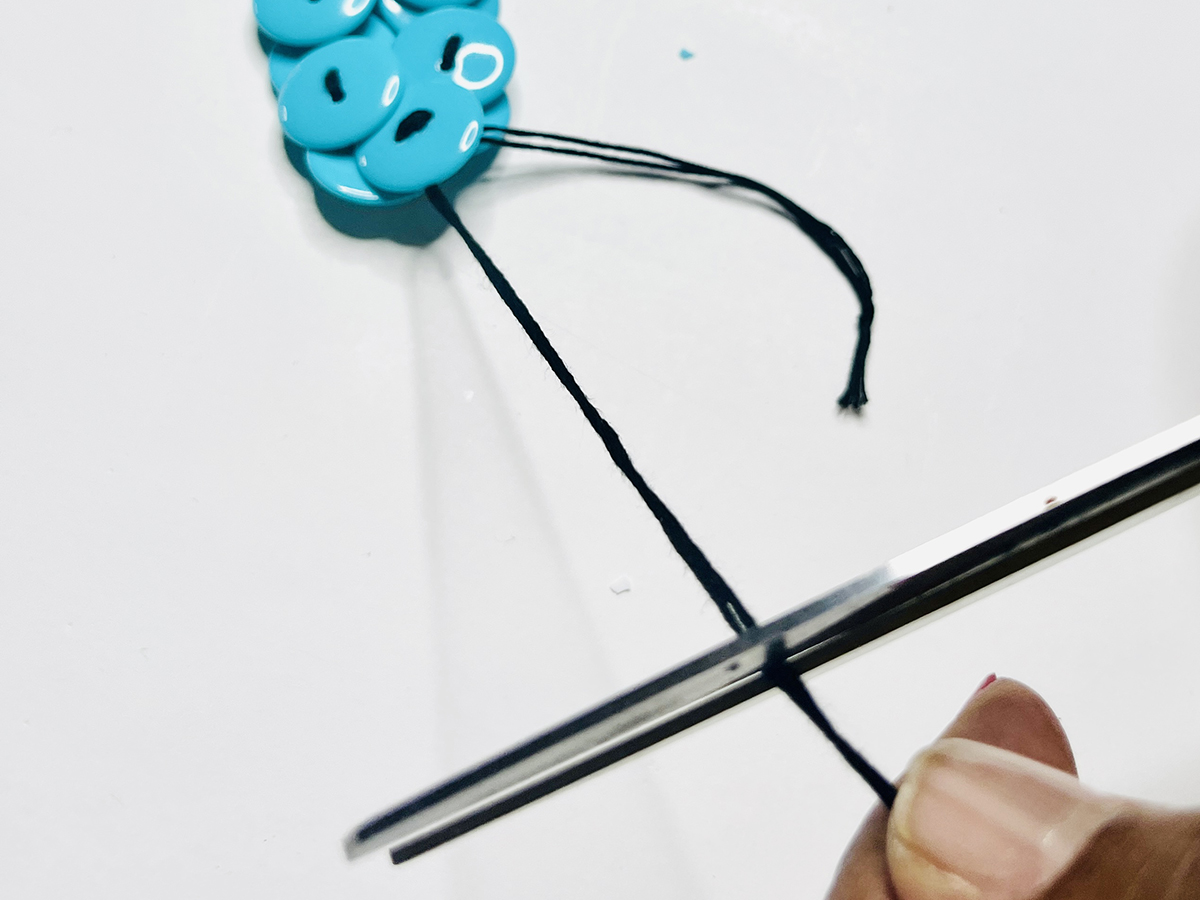
6. Clip the remaining pieces of hanging thread.
Step 7 – Buttons On!
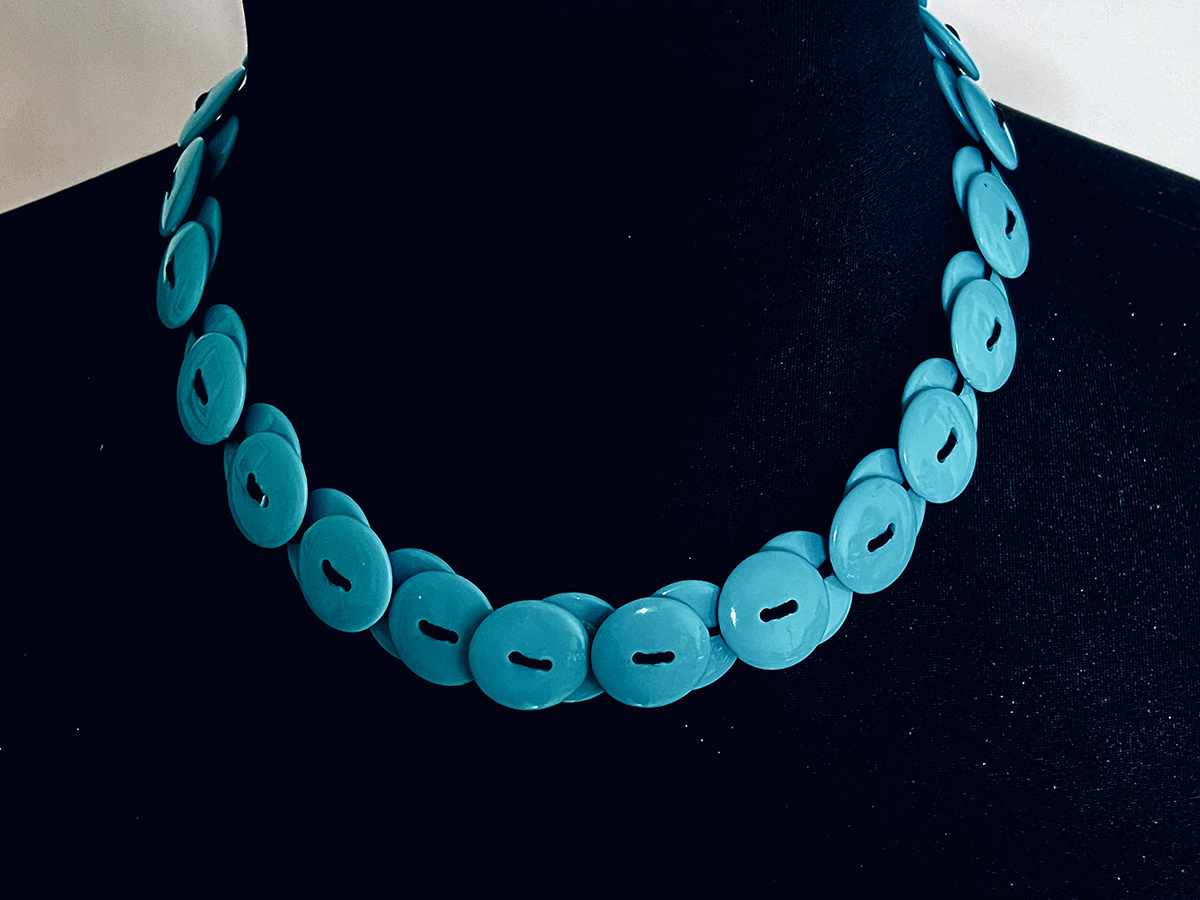
Put your buttons on and wear your necklace with style!
CREATIVE PROMPTS FOR MORE
- Categorize your buttons by color, shape, or size and make necklaces according to these groupings. How do the necklaces differ from one another? Do they look different? Feel different to hold or wear?
- Experiment with different material buttons. Buttons come in plastic, wood, shell, and more! How does the material of your buttons affect the sound of your necklace?
- What other kinds of accessories can you create? Use less buttons and a shorter thread to make a bracelet, or more buttons and a longer thread to make a belt!
RELATED RESOURCES
- Beau McCall: Buttons On! is an almost 40-year retrospective featuring button-covered wearable and visual art. Beautiful Button Necklaces are just one of many of Beau’s creations. Check out the exhibition to explore the scope of his work!
- Check out Beau McCall’s website to view more of his work and shop his store!
- Beau McCall and Patrick Kelly are both Black, gay artists who were prominent in New York City in the 80s. Through their work with buttons, both addressed the homophobia and racism they experienced and expressed their unrelenting joy. Now that you’ve explored Beau’s work, learn about Kelly’s. What similarities and differences do you notice?
CONNECT SOCIALLY AND LEARN MORE
![]()
![]()

Share your project! Post and tag #MCDatHome
UPCOMING EVENTS

Free First Thursdays

MakeArt Library: Portola Branch

SF Design Week Event: A Roadmap to Stardust – Design, Mythology, and the Future