Color Catcher
Sponsored by

RECOMMENDED AGE LEVEL
Recommended for ages 4 and up with adult supervision.
PROJECT DESCRIPTION
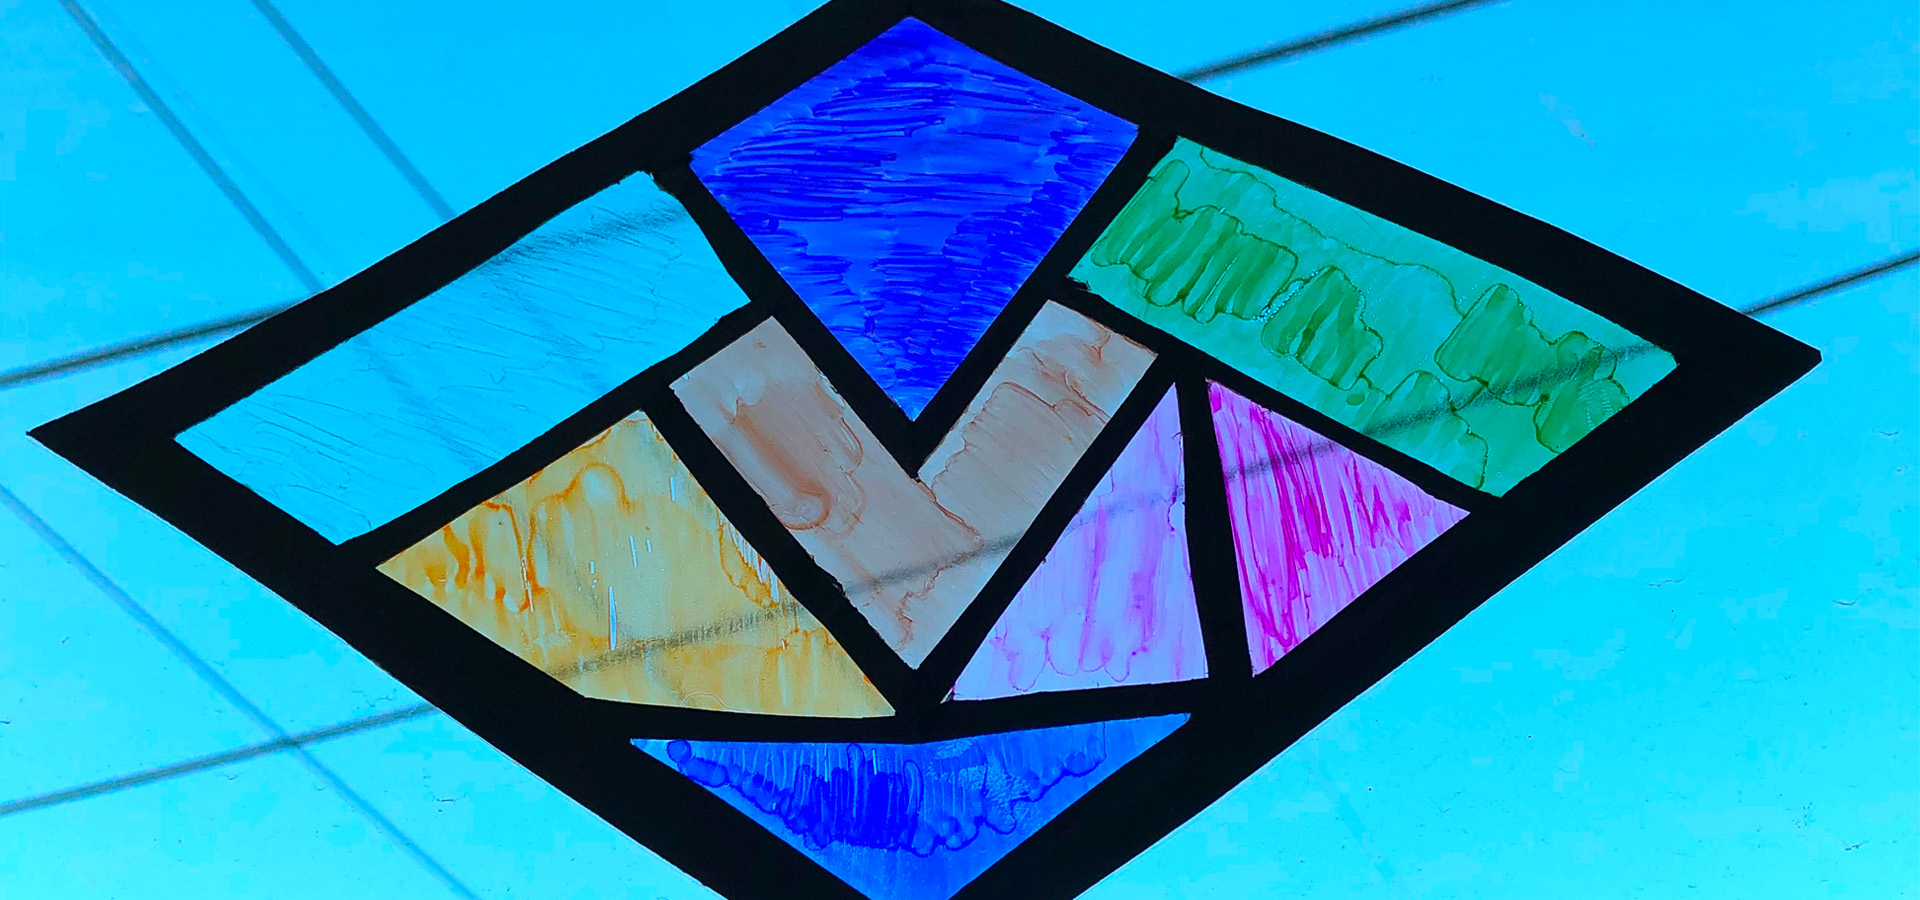
Would you like to know how to color light? This project incorporates natural light, color, geometry, and architecture elements for a version of a stained glass window that will make sunlight dance!
MATERIALS
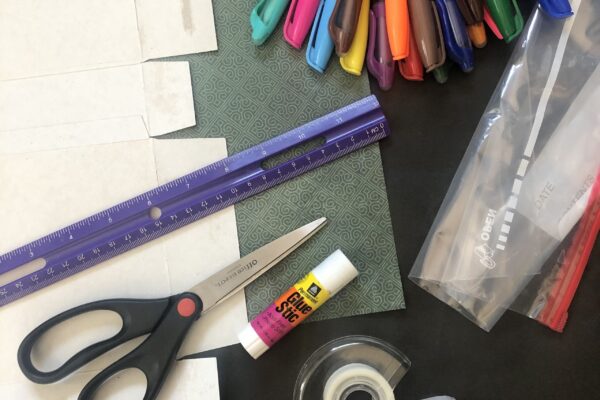
Cardstock, black construction paper, or recycled food box material
Uncolored cellophane (recycled or new) or gallon freezer bag
Glue stick
Scissors
Colored permanent markers
Black marker
Ruler
Tape
Pencil


INSTRUCTIONS
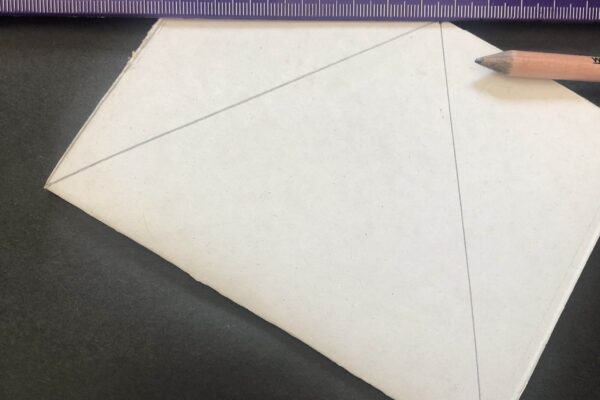
- Fold your cardstock paper in half.
- The example is folded in half horizontally, but feel free to mix things up.
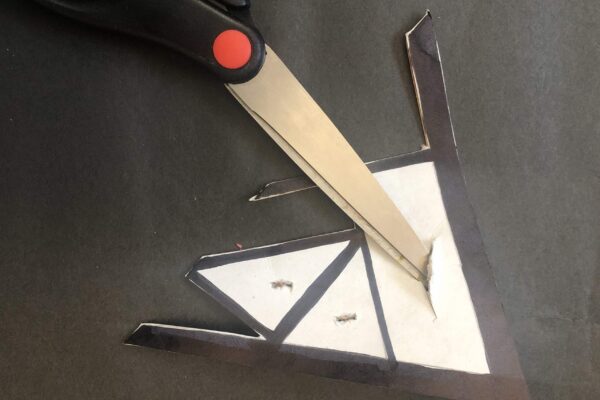
- When you have folded your paper, use a ruler to sketch an arch, point, or angle across the non-folded side(s).
- Cut along the lines.
- Draw a border line approximately ½ inch from the cut edges.
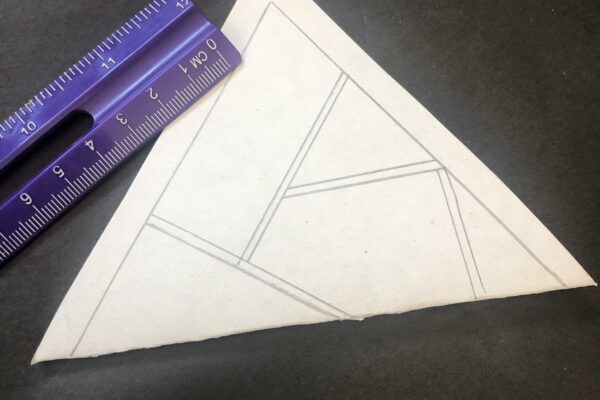
- With it still folded, draw your desired pattern[s] on your paper, making double lines either ¼ to ½ inch apart.
- Look up stained glass windows for inspiration.
- Keep in mind that straight lines will be easier to cut.
- For best results, mix large and small versions of similar shapes.
- Color your lines in with a black marker.
- With either the tip of your pencil, or the point of your scissors, carefully poke a hole inside the shapes you have drawn.
- Make sure to poke through both halves of the paper.
- Use scissors to cut the shapes out of both sides of the folded paper at once.
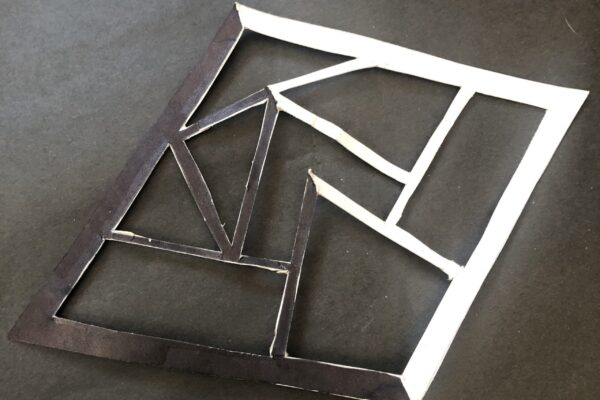
- Unfold the paper to reveal your stained glass borders!
- Do the shapes look like you had imagined while the paper was still folded?
- Use a black marker to fully color the borders you have just created.
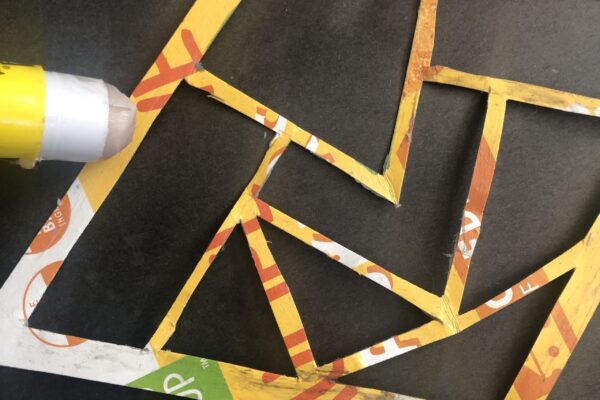
- With your scissors, separate the two sides of a gallon freezer bag. Recycle the side that has any writing on it.
- Flip the black borders over and put glue stick all along the back.
- Affix the borders to the remaining half of freezer bag. Press firmly.
- Flip everything over and place on a piece of printer paper so you can clearly see the next steps.
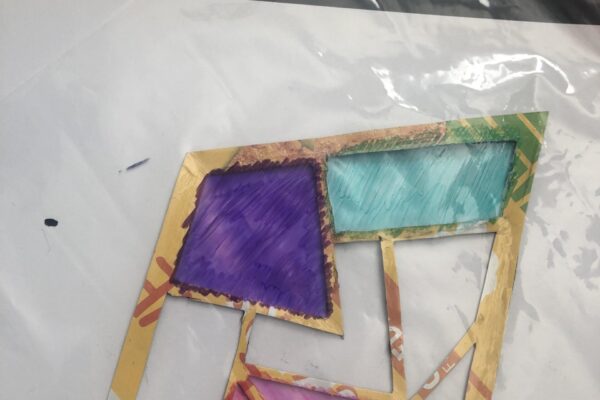
- Use colored permanent markers to fill in each of the shapes.
- Color slightly past the borders for a more “full” color look.
- Try going over your marker layers a couple of times.
- Notice the way the markers behave on the plastic. Can you play with this effect at all?
- Allow marker to dry.
- With scissors, trim the plastic from the outer border of your creation.
- Use small loops of tape to affix the stained glass to one of your windows.
- How does this new “window within a window” affect your view?
- Does the new colored light change your visual perspective?
RELATED RESOURCES
- Find inspiration in 7 of the World’s most Beautiful Stained Glass Windows and find out How Stained Glass is Made!
UPCOMING EVENTS

Free Summer Weekend!
July 25 - July 26
The Fabric of Celluloid: A Conversation with Dr. Alla Gadassik
August 1 @ 1:00 PM - 3:00 PM

Craft + Chat Workshop with Greg Climer
August 15 @ 1:00 PM - 3:00 PM