Crochet Basics
RECOMMENDED AGE LEVEL
6+ with adult supervision
PROJECT DESCRIPTION
Crochet is an age-old fiber art used to create sweaters, hats, scarves, and more using just yarn and a single hook. Crochet pieces are made by creating a sequence of interlocking loops and adding rows on top of one another – eventually creating a fabric. Technological advancements have led to the automation of other fiber arts like knitting and weaving but a crochet machine has yet to be invented – all crocheted works are handmade!
Learn the basics and build the skills you need to create your own garments or fiber art. This beginner-friendly tutorial introduces the craft’s fundamental building blocks: making a chain, adding rows, and the single crochet stitch. Build your skillset and comfort before embarking on more complex projects!
MATERIALS
- Yarn
- Crochet Hook | Make sure your hook size matches your yarn size
- Scissors
- Tapestry Needle
FIBROUS FORTITUDE
Learning fiber crafts like crochet can be frustrating. The hook may feel awkward in your hand, the yarn tension might be wonky, and the process itself can be confusing.
Give yourself the space to work through these challenges. Embrace the learning journey and accept that your first piece won’t be perfect. Push through to finish the first piece despite flaws you may notice along the way. Soon, muscle memory will take over, and you’ll be hooked on this timeless craft!
INSTRUCTIONAL VIDEOS
INSTRUCTIONS
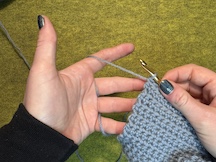
How to Hold Your Hook
Hold hook in dominant hand using either the pencil hold or the knife hold. Choose the method that is most comfortable for you! Practice both and switch between grips to avoid hand and finger strain.
Pencil Hold
Knife Hold
How to Hold Your Yarn
Hold yarn in a non-dominant hand.
Hold a small amount of tension in the yarn to create even stitches.
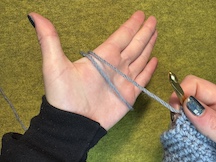
Either wrap yarn around your palm.
Or weave it through your fingers.
Step 1 | Tie a Slip Knot
All crochet projects start with a slip knot. This type of knot creates a loop that can be expanded or contracted around your crochet hook.
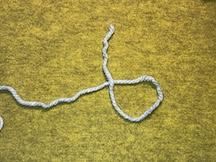
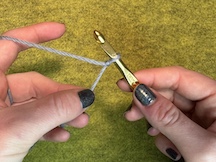
1. Create a loop in your yarn with the shorter end of the yarn crossing over top of the long end towards the side furthest from you.

2. Fold the loop you just created over the longer end.
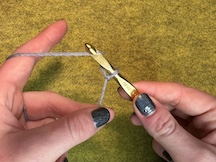
3. Grab the longer side of the yarn and pull partially through your loop, creating a final loop.
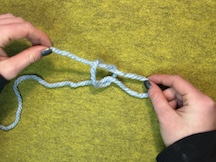
4. Pull on your short yarn to tighten around your new loop.
5. Check slip knot. Your slip knot is tied correctly if you can pull on the long yarn and tighten your loop – if you pull too tight your knot will unravel
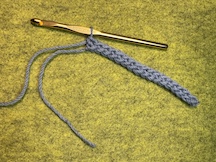
Step 2 | Make a Chain
Making a chain is the first step of crocheting. If you are making a certain project, make sure your starting chain is the correct size.
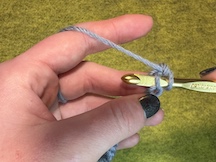
1. Place your slip knot on hook and pull your long/working yarn to tighten it.
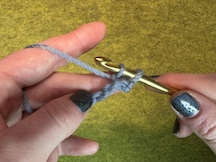
2. Pull working yarn behind, around, and over hook. This is called yarn over.
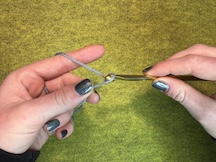
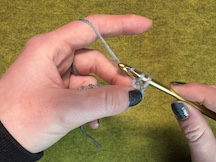
3. Pull existing loop up and over new loop, using the hooked end to hold the new loop.
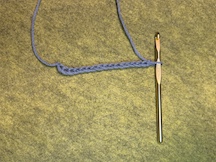
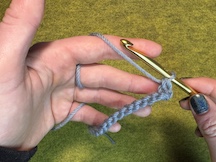
4. You have now created one chain! Repeat from Step 2 until you have a long enough chain for your project.
TIP: Don’t pull your first chains too tight – you will be adding a row over top.
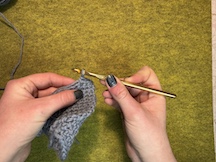
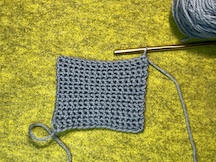
Step 3 | Adding Rows / Single Crochet
To make your project taller, add rows to your crochet chain. There are different kinds of stitches, but we will learn using single crochet (SC) stitch.
1. Add one more stitch to your completed chain and turn your work. You will now be working from most recent to first chain you made.
2. Insert your hook in the second chain stitch from your hook and yarn over.
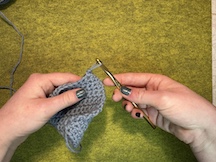
3. Pull yarn through existing chain, creating a new loop – this is called “pulling up a loop”. You should now have two loops on your hook.
4. Yarn over again and pull through both loops, completing one single crochet stitch. You should be left with one loop on your hook.
5. Repeat steps 2-4, inserting your hook into each subsequent chain until you reach the end of your original chain.
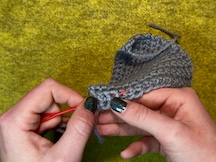
Step 4 | Finish Your Work
Finishing your work is important to make sure your crochet creation lasts. Weave in your ends and trim excess in order to secure them.
1. After your final stitch, add one more chain and trim excess yarn.

2. Pull end of yarn all the way through to create a finishing knot.
3. Use a tapestry needle to weave in tail ends of work. Weave in one direction, and then in the opposite direction to secure.
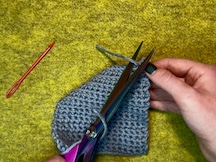
4. Trim excess yarn.
OPTIONAL: Block your work using water and a foam mat or blocking board. This will straighten out edges and even out tension.
GLOSSARY
- Hook: Crochet hooks are the tools used to crochet. They come in many different sizes and are classified by millimeter, letters, or numbers. These vary by brand and country of origin, but conversion tables are easily found online.
- Tension: Tension is how tight or loose something is. In crochet, you control tension with your non-dominant hand, which is holding the yarn. It is important to maintain even tension throughout your work so that each row is evenly spaced.
- Yarn Types: There are two types of fibers used to make yarn: natural and synthetic. Most yarns purchased from large craft stores are acrylic, which can be a much more affordable option for beginners. Natural fiber yarns are more expensive due to the amount of labor and time spent creating these yarns, but they contain lower levels of plastic (or none). There are benefits and disadvantages of using both kinds of fibers, and their unique properties make them good for different types of projects. .
- Slip Knot: All crochet projects start with a slip knot. This is a type of knot that creates a loop that can be expanded or contracted around your crochet hook.
- Yarn Over: You will yarn over at almost every step of each stitch. It is important to yarn over in the correct direction. Make sure you bring your hook around, behind, and over, rather than laying it directly over top of your hook.
- Pull Up a Loop: Pulling up a loop involves using your hook to pull working yarn through an existing loop.
CREATIVE PROMPTS FOR MORE
- Make a crochet chain lanyard. Use it to hold your phone, keys, or ID.
- Use your sample square as a coaster! Use different color threads and a tapestry needle to sew a design on it.
- Use your sample square as a trivet to protect surfaces from hot bowls or pots.
RELATED RESOURCES
The internet is rich with artist tutorials demonstrating a huge variety of crochet tips, techniques, and tutorials. Use the links below to expand your practice once you’ve mastered the basics!!
- Increases and Decreases.
- Magic circle – easily start hats and work in the round.
- Double crochet, treble crochet, moss stitch, and more.
- How to read a crochet pattern.
- Blocking your project.
- Amigurumi.
- Granny squares – there are lots of different variations to this classic crochet element
CONNECT SOCIALLY AND LEARN MORE
![]()
![]()

Share your project! Post and tag #MCDatHome
UPCOMING EVENTS

Free First Thursdays

MakeArt Library: Portola Branch

SF Design Week Event: A Roadmap to Stardust – Design, Mythology, and the Future