
Knitting Basics
RECOMMENDED AGE LEVEL
6+ with adult supervision.
PROJECT DESCRIPTION
Knitting is one of the most ancient ways humans have made clothing. The oldest known knitted artifact is a pair of socks from Egypt, dated to the 11th century. From there, knitting spread across the world, keeping people fashionable and warm for hundreds of years. In the 1500s the craft was changed forever with the invention of the mechanical knitting machine, which revolutionized the textile industry through automated production of knit garments. Despite this, hand knitting has remained a beloved way for crafters to relieve stress, connect with their community, and, of course, to create beautiful, unique projects!
Learn the basics and build the skills you need to create your own garments or fiber art. This beginner-friendly tutorial introduces the craft’s fundamental building blocks: casting on, the knit stitch, and casting off. Build your skillset and comfort before embarking on more complex projects!
FIBROUS FORTITUDE
Learning fiber crafts like knitting can be frustrating. The needles may feel awkward in your hand, the yarn tension might be wonky, and the process itself can be confusing.
Give yourself the space to work through these challenges. Embrace the learning journey and accept that your first piece won’t be perfect. Push through to finish the first piece despite flaws you may notice along the way. Soon, muscle memory will take over, and you’ll be hooked on this timeless craft!
MATERIALS
- Yarn
- Knitting Needles: Make sure your hook size matches your yarn size.
(Most yarns you purchase will specify needle size on the label. Look for a small square containing crossed needles and a number.) - Scissors
- Tapestry Needle
INSTRUCTIONAL VIDEOS
Follow along as Rae Lanzerotti and MCD narrate their creative approaches!
VISUAL STEP BY STEP


DESIGN THINKING PROMPTS
- Using dimensional materials, we create specific textures and shapes to reproduce artworks in a new, tactile form.
- Practicing sensory and image description of artworks expands how we relate to art and with each other.
- Iterative art— like a game of creative telephone started by human designers, fabricated by a robot, and then recreated by us— encourages curiosity and reflection about the process and purpose of making art.
INSTRUCTIONS
Casting On | Long Tail Method
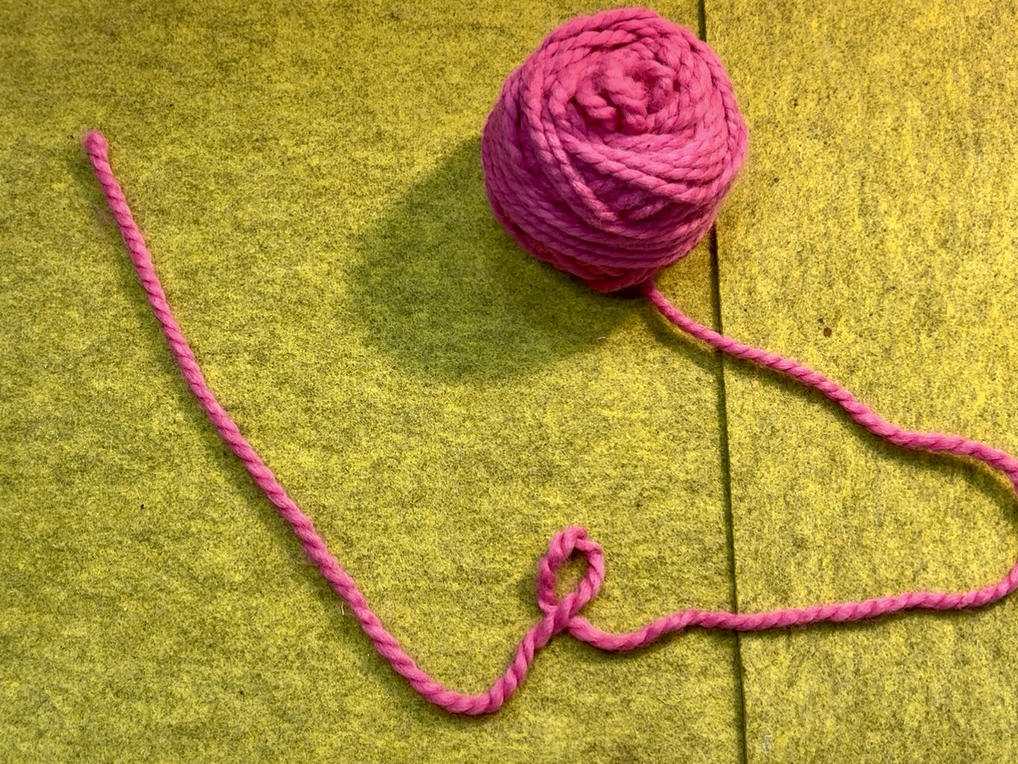
Step 1: Create a Long Tail
- Pull out about 18 inches of yarn from your ball.
- Loop yarn roughly 12 inches from the start of the tail. The shorter end of the yarn should lay on top of the loop.
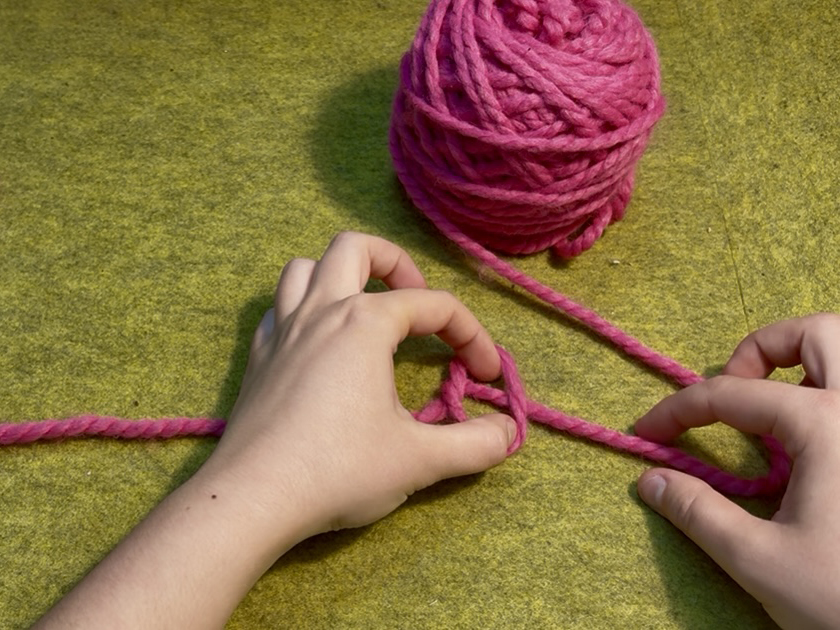
Step 2: Tie a Slip Knot
- Fold loop over towards the longer end of the yarn.
- Pinch yarn running underneath your loop.
- Pull pinched yarn through original loop to form slip loop.
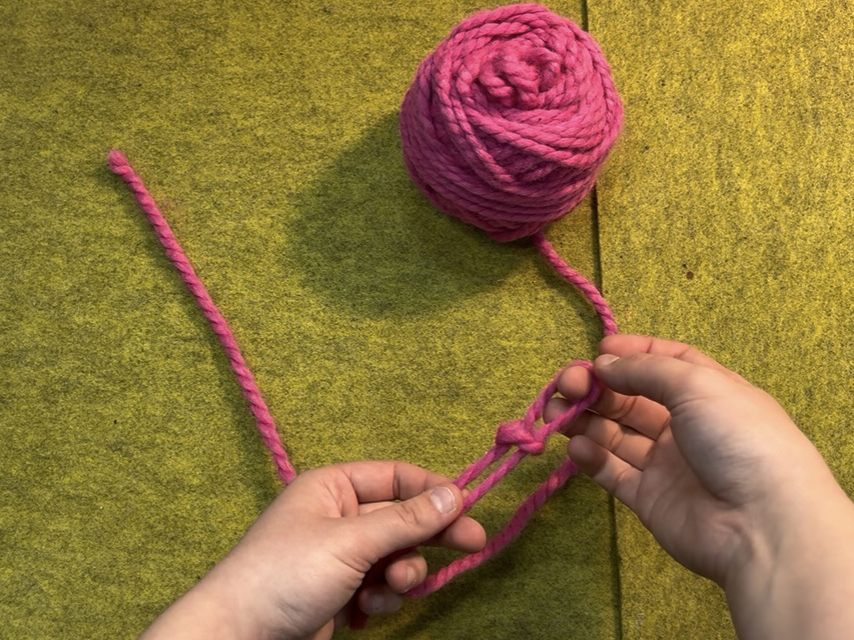
You should now have what resembles a loop with a belt around it, and two tails pointing the same direction. - Pull up on loop to tighten its “belt.”
- Check slip knot.
Your slip knot is tied correctly if you can pull on the longer tail (working yarn) and tighten your loop – if you pull too tight your knot will unravel.
Step 3: Cast On
- Place slip knot on one of your knitting needles and pull working yarn to tighten.
Your loop should be just tight enough to remain on the needle, but loose enough to slide up and down. - Adjust slip knot so both working yarn and tail are on the left side of the needle. The tail should be closer to you, and the working yarn further away.
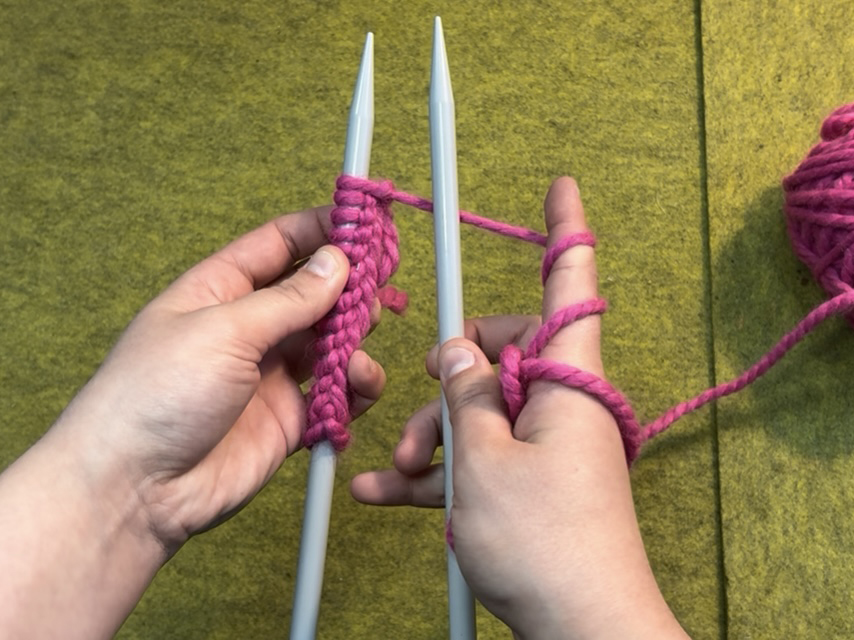
- Hold needle in right hand. Touch left index finger and thumb together.
- Place fingers between the tail and working yarn so they form a “V” around your fingers.
- Spread your fingers to widen the “V” of the yarn strands. Using your remaining three fingers, grab the yarn to create tension in both strands.
- At this point, your yarn should resemble a slingshot wrapped around your fingers. (See labelled image. From this point on yarn strands will be referred to as A, B, and C.)
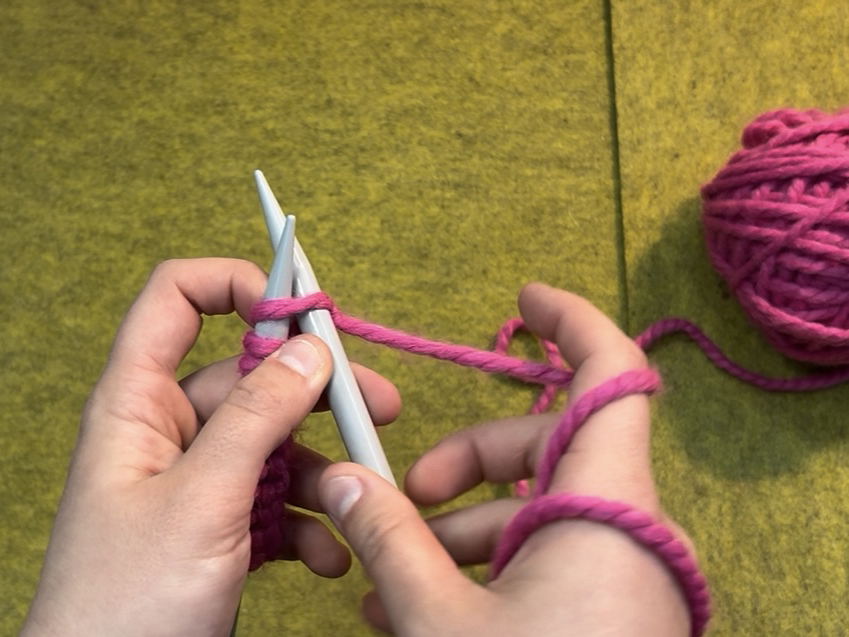
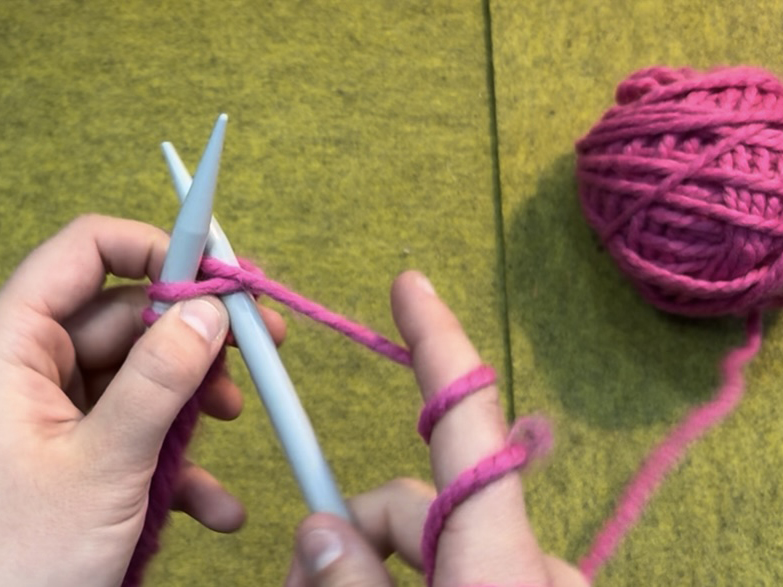
- Touch your needle to the meat of your thumb and pass it under yarn A and over yarn B.
- Bring needle over yarn C to touch the base of your index finger, then pass under yarn C.
- Bring your needle through the hole between yarns A and B.
- Pull working yarn and tail to tighten new loop around needle.
- Release the yarn from your slingshot grip.
You have now cast on one stitch! There should be two stitches on your needle, the one you just created, and the one formed by your starting slip knot. - Continue casting on until you reach 15 stitches.
Don’t pull stitches too tight, or knitting your first row will be very difficult.
Knit Stitch
The Process
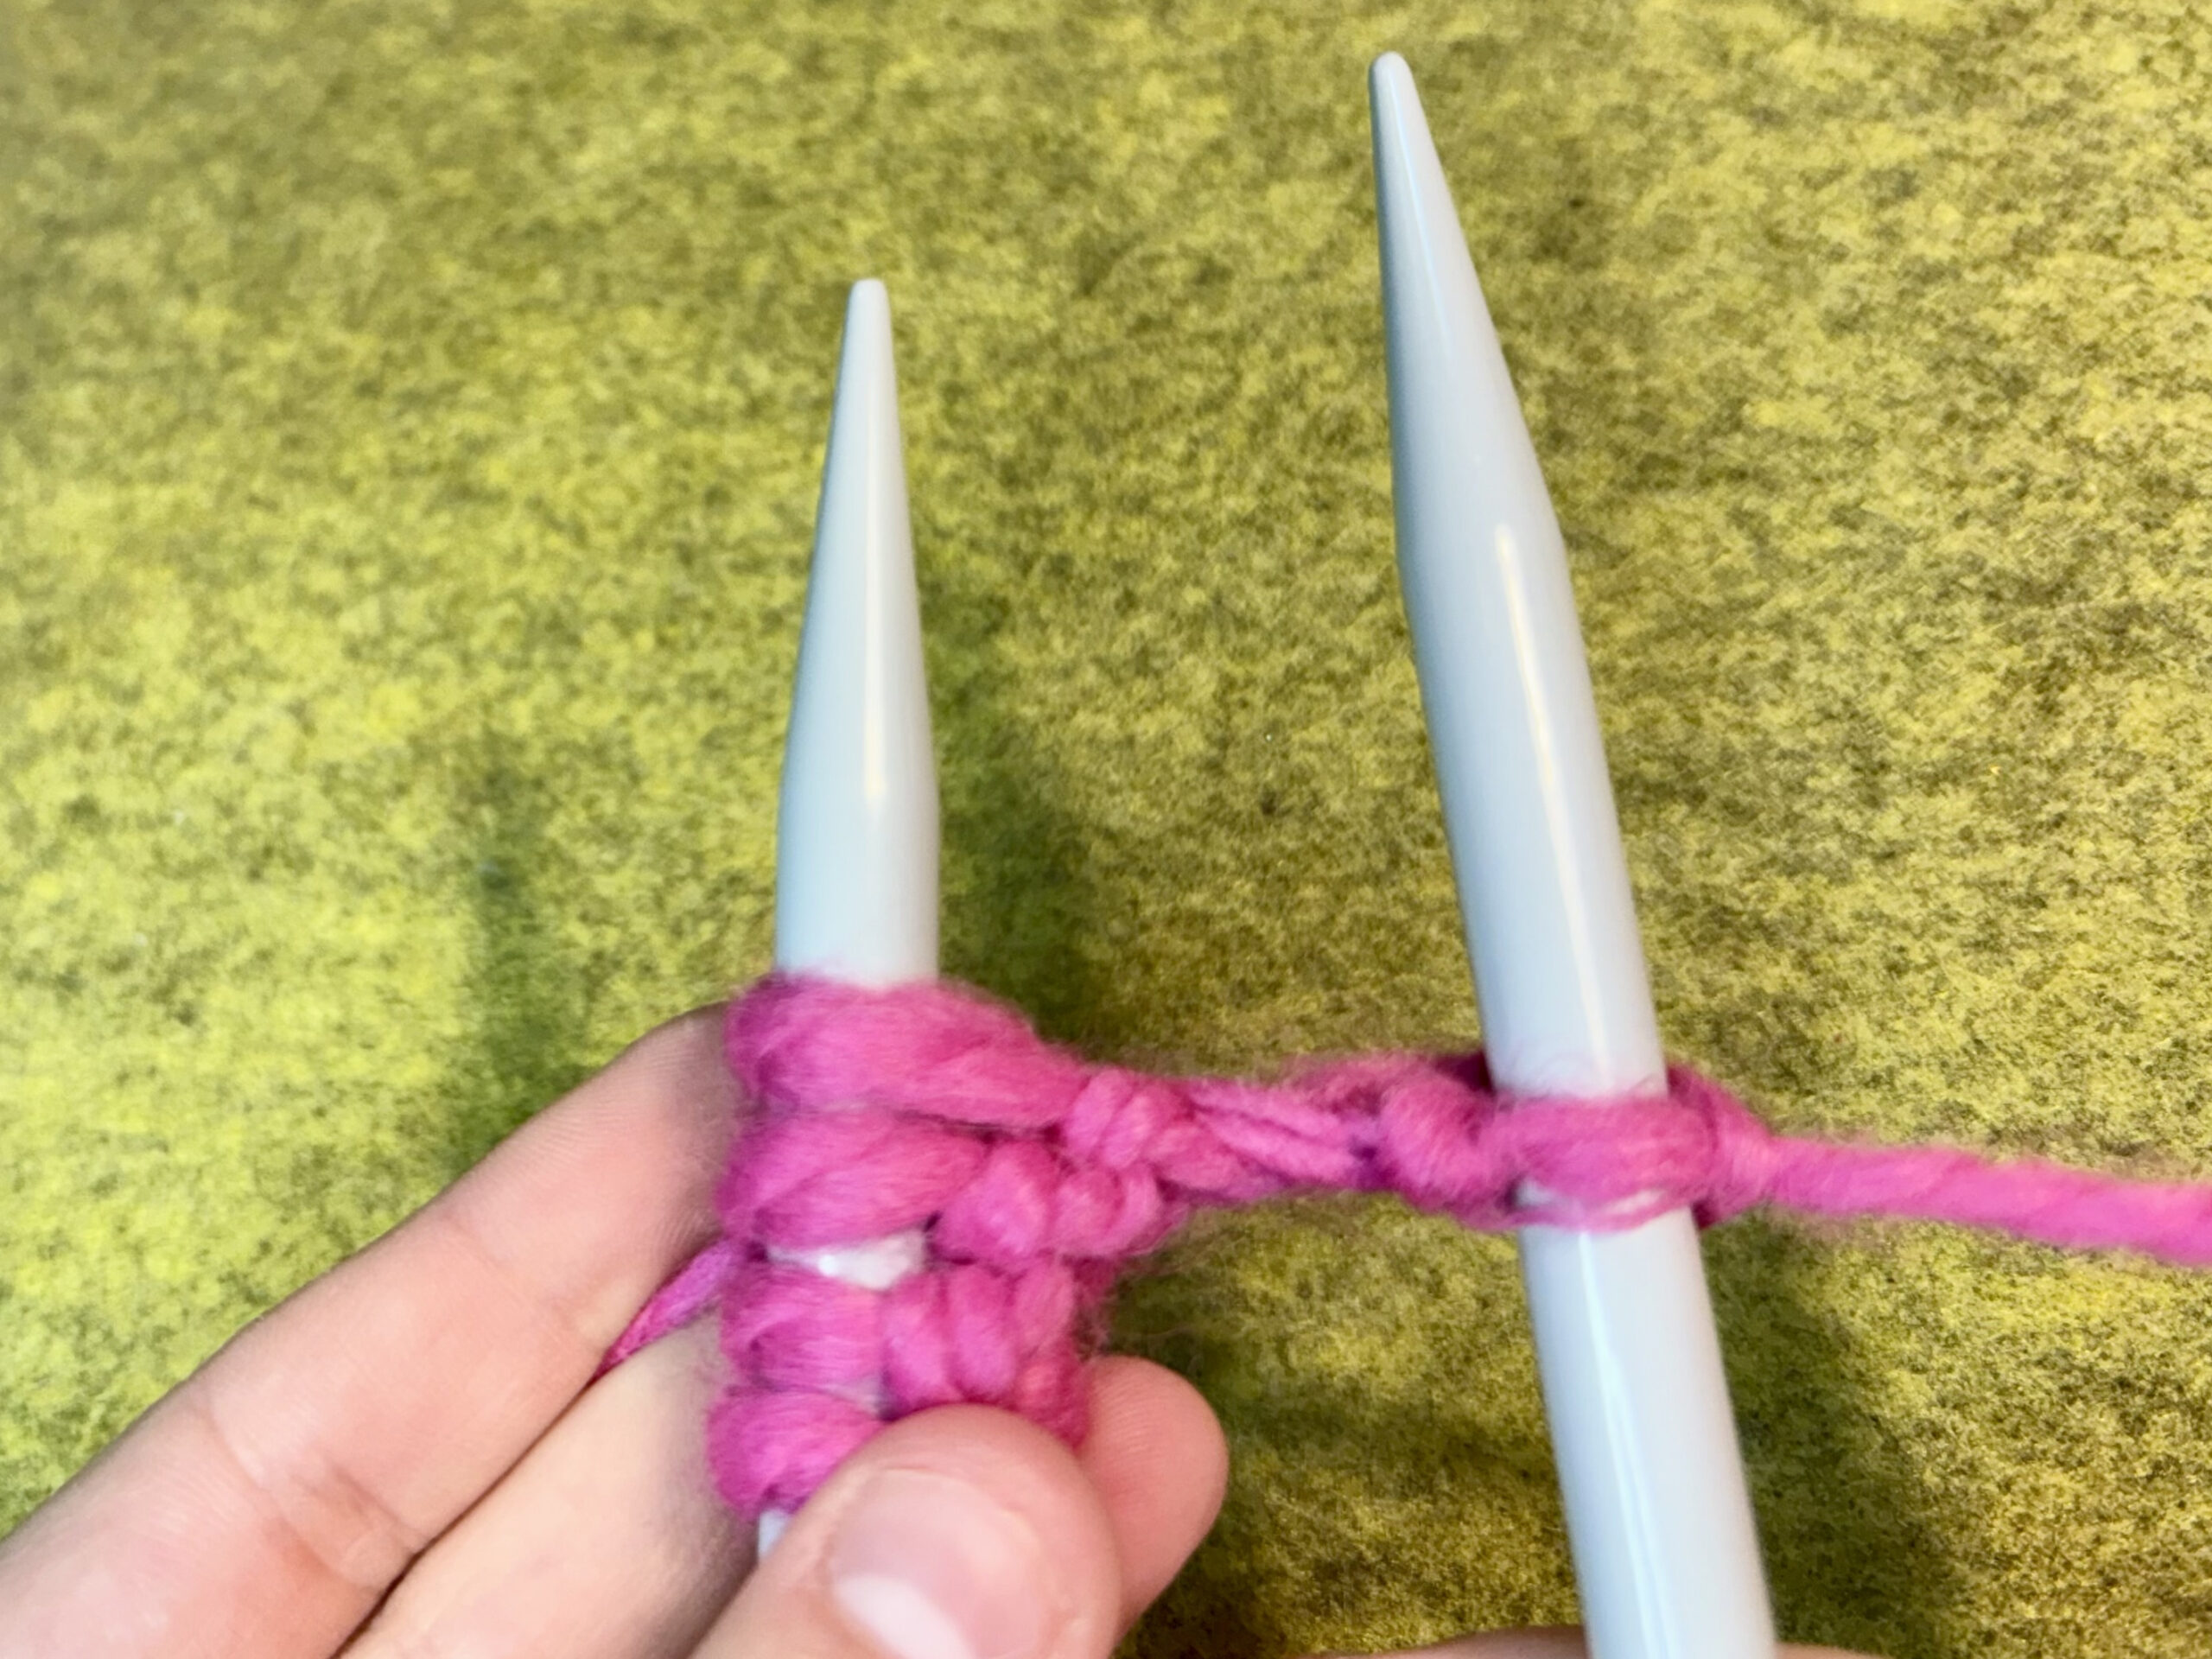
- When knitting flat (i.e. not on corded needles), you will be moving each stitch from the left-hand needle to the right-hand needle.
- Once you reach the end of a row, you will switch your needles and move left to right again.
- In this sense, you will be knitting on “both sides” of the textile because it is being flipped each time you change hands.
This is why garter stitch appears similar on both sides.
How to Knit
- Hold your needle with cast-on stitches in left hand, and other needle in right hand.
- Orient your cast on stitches so that the ‘ridge’ or row of “V”s is facing to the right.
- Experiment with different ways of holding your working yarn in your right hand.
For consistent tension, we recommend wrapping working yarn a few times around your palm and then a few times around your index finger. - Make sure your long tail from casting on is out of the way and that you are only using the working yarn to make stitches!
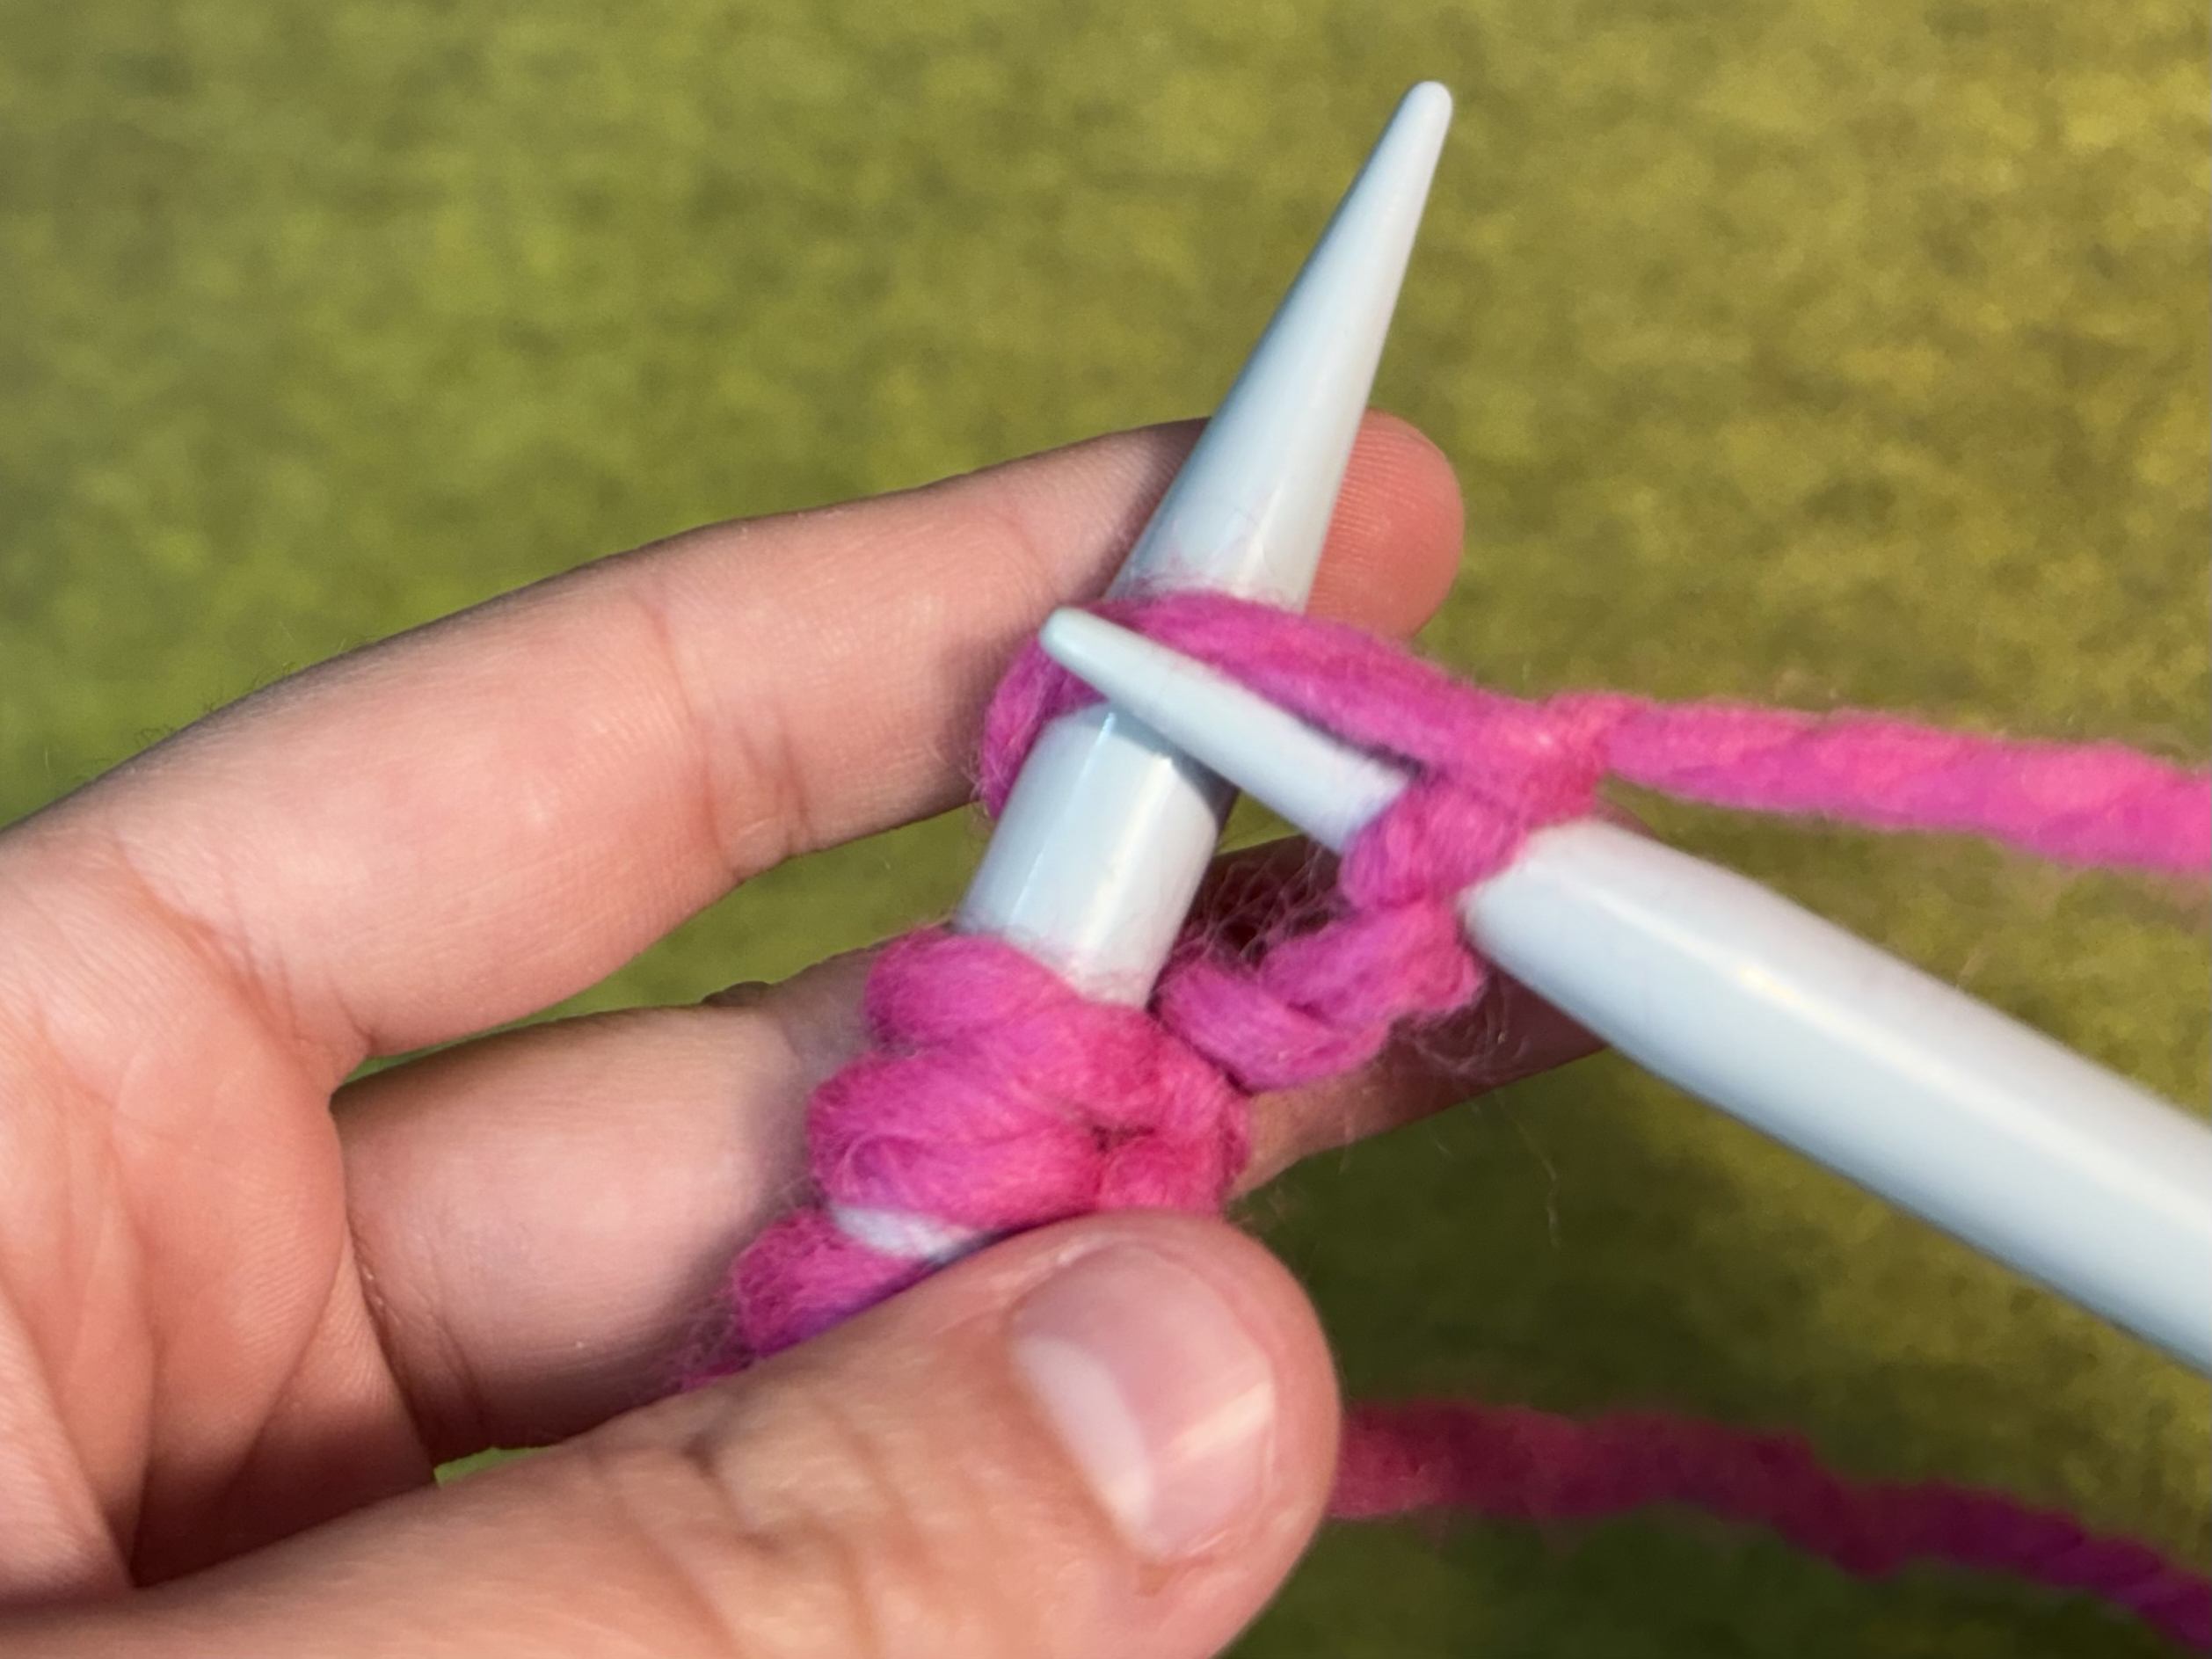
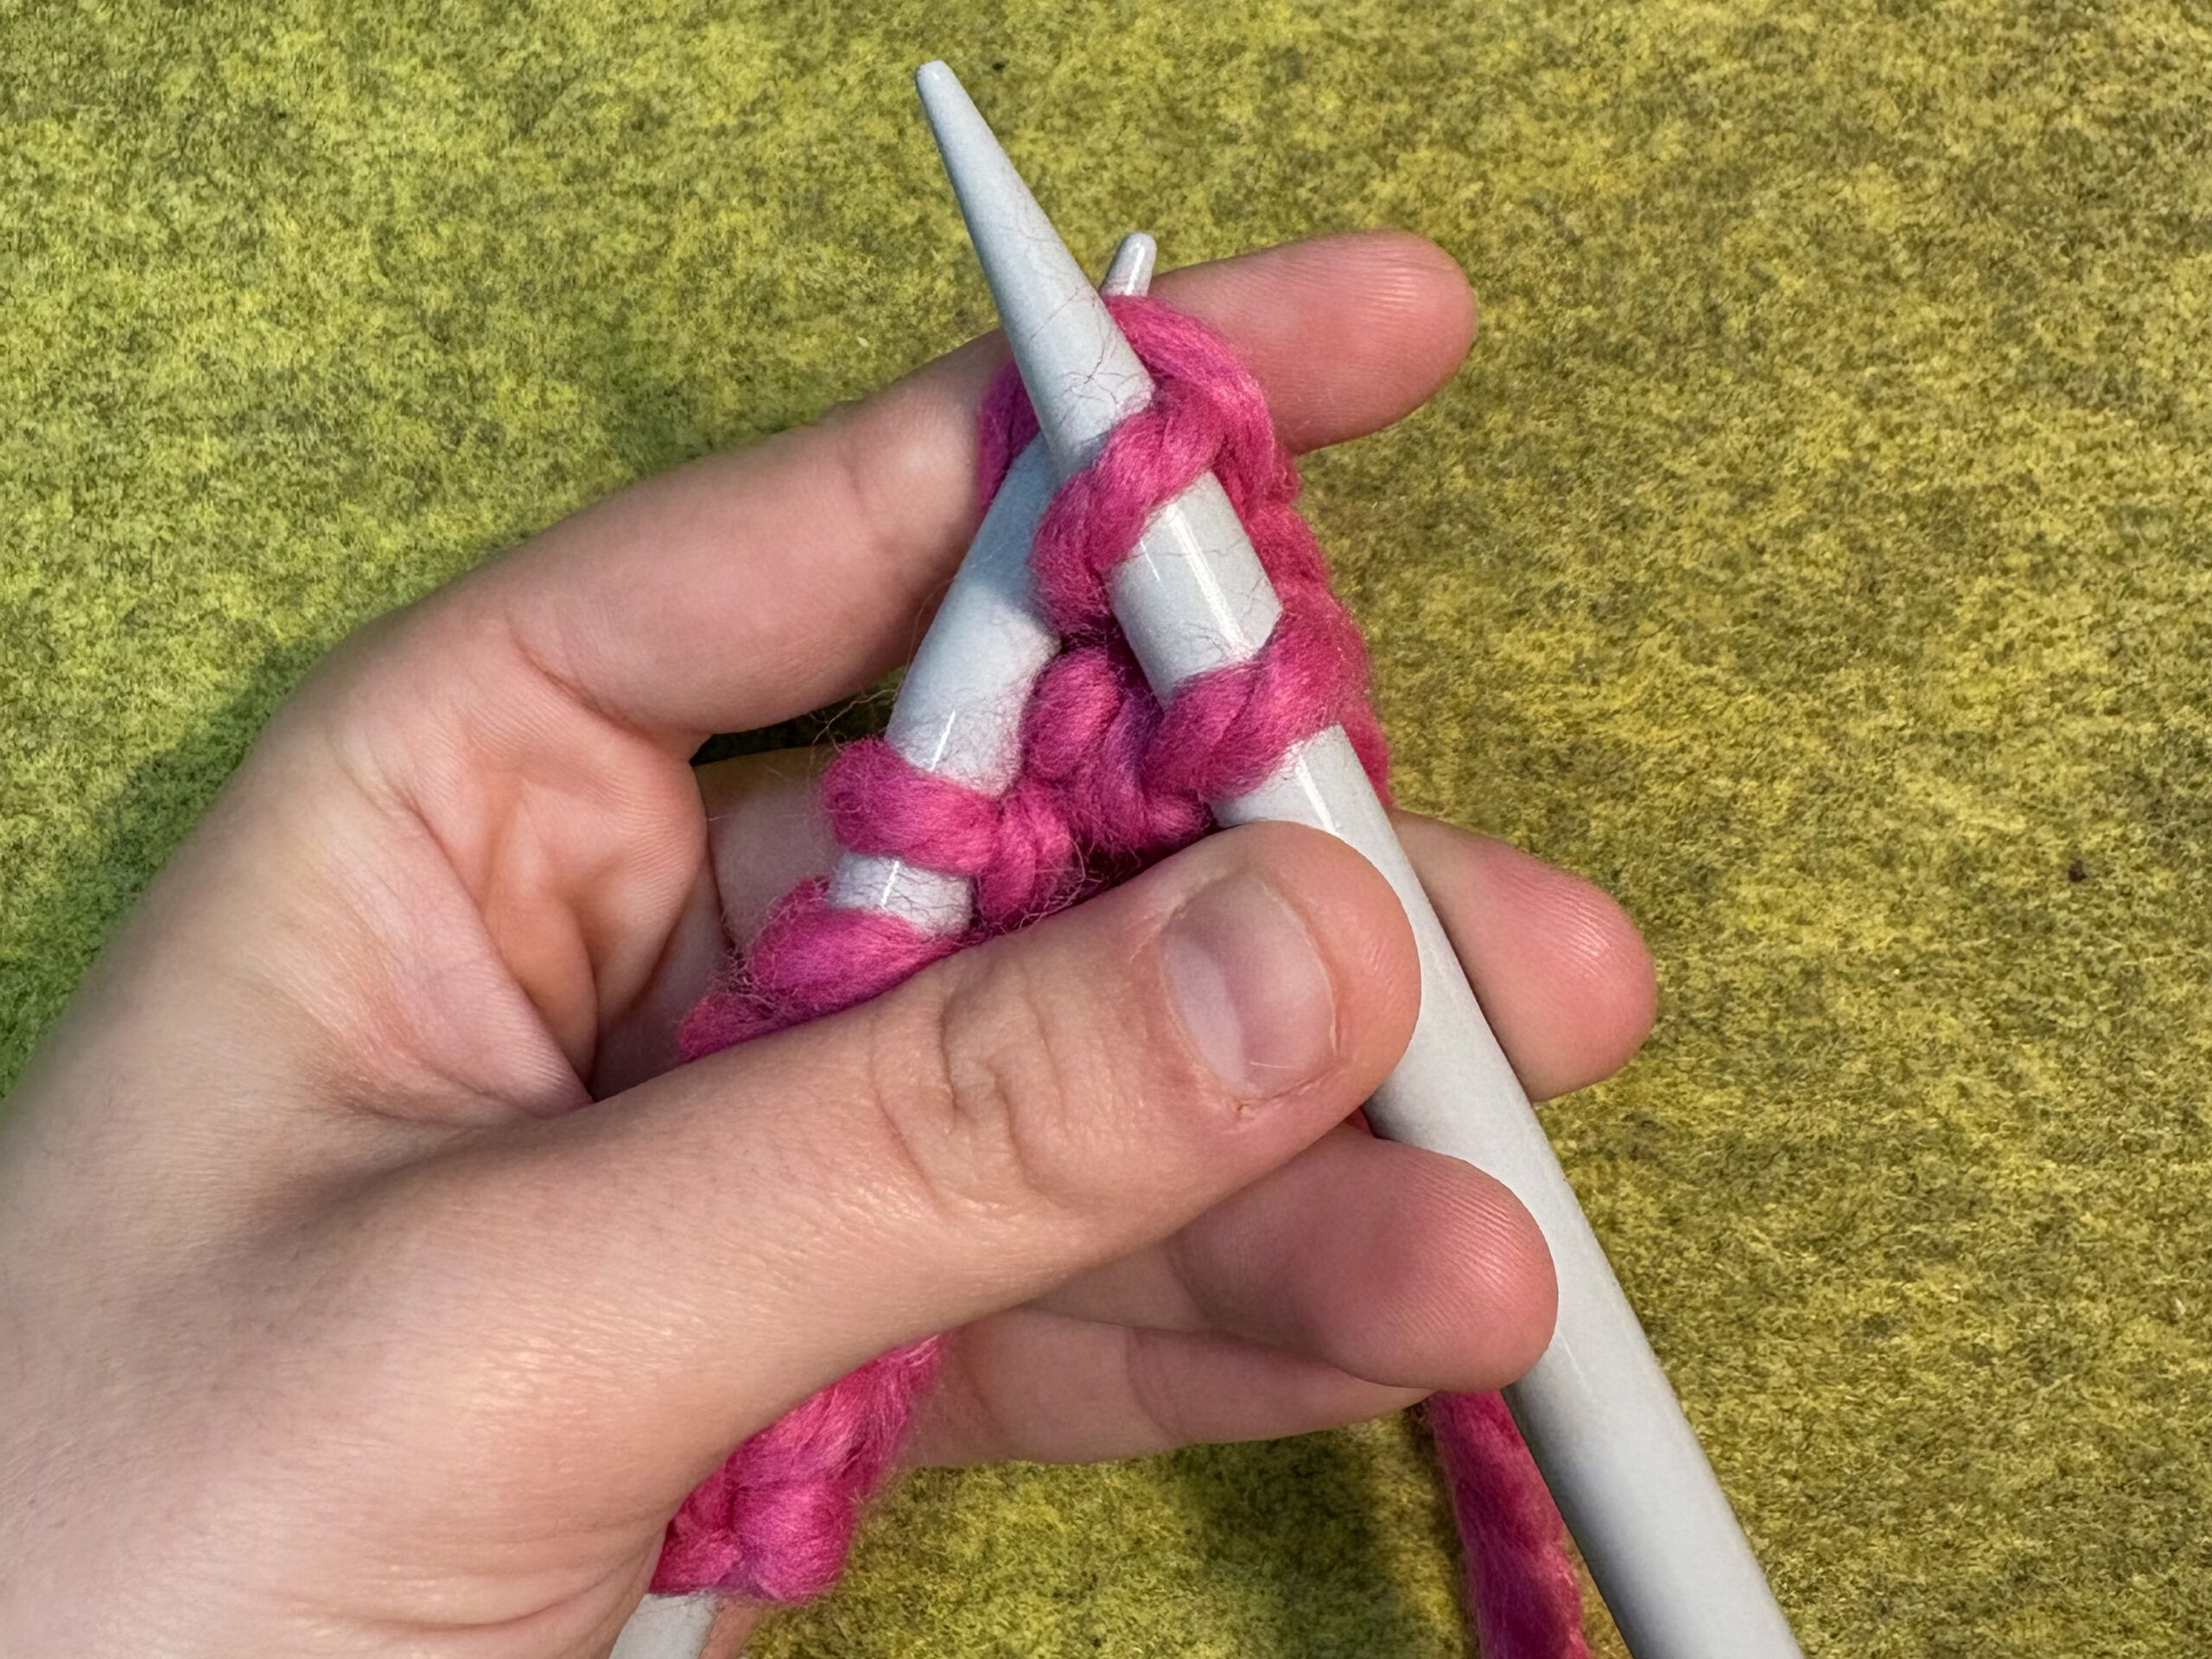
- Insert tip of right needle into the first stitch on left needle. Needles should form an “X” with right needle behind left.
- Using working yarn around your index finger, wrap yarn around the tip of right needle from back to front (counterclockwise).
- Angle right needle down and towards you. This should expose the loop made by the first stitch and working yarn.
- Slip tip of right needle through the exposed loop.
- Drag needle up to slip the loop off of the left hand needle and onto the right. Lightly pull working yarn to tighten if necessary.
- Repeat for each stitch on the left hand needle until all stitches are on right needle.
You have now completed your first row! - Switch your needles so the empty needle is in your right hand and your working needle is in your left hand.
- Rotate your project so that your work is in the middle of the needles and the working yarn comes out of the top stitch facing right.
- Continue knitting! Watch the cumulative garter stitch form with each additional row.
- Always try to complete a full row before setting your project down. Storing your work all on one needle will help prevent stitches from slipping off your needles.
Casting Off
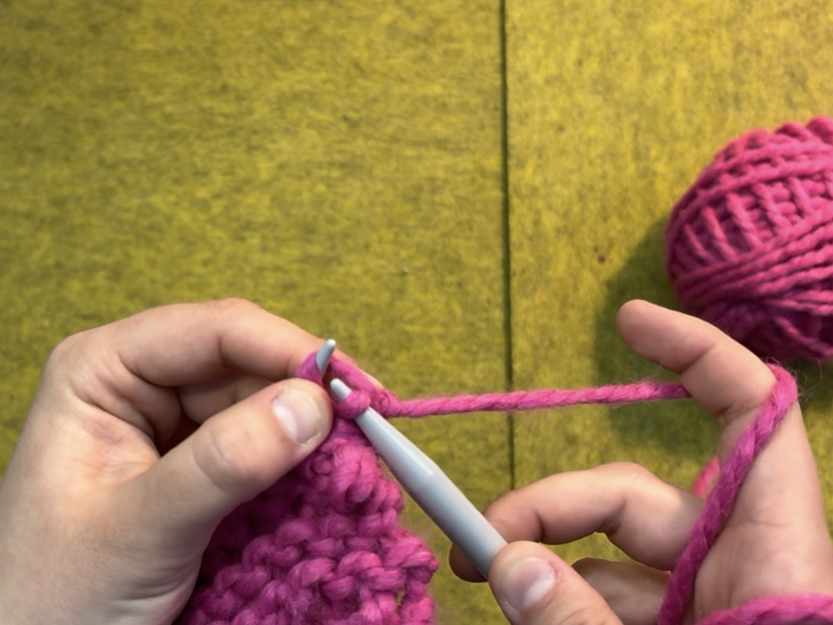
- Once you have knit the desired length of rows, it is time to cast off or secure your project off the needles.
- Knit two stitches onto your right hand needle.
- Using your left needle, slip the bottom stitch up and over the top stitch so that only one stitch remains on the right hand needle.
You have just cast off one stitch. - Knit one so there are once again two stitches on your right needle.
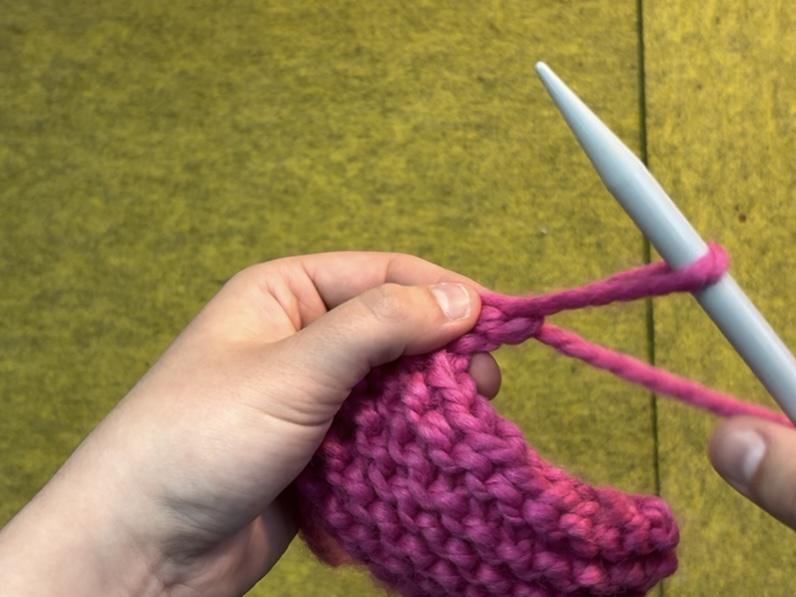
- Slip bottom stitch up and over top stitch so that only one stitch remains on the right hand needle.
- Repeat step 5 (knit one, slip one) until only the last stitch remains on your right hand needle.
- When only one stitch total remains, snip your working yarn leaving about a 6 inch tail.
- Wrap working yarn tail around final stitch and pull bottom stitch up and over with same technique as before.
At this point, it will likely be easier to use your fingers rather than your other needle. - Pull working yarn tail through the final loop you’ve created.
- Slip project off the needle and pull to tighten.
This should create a knot sealing the end of your project!
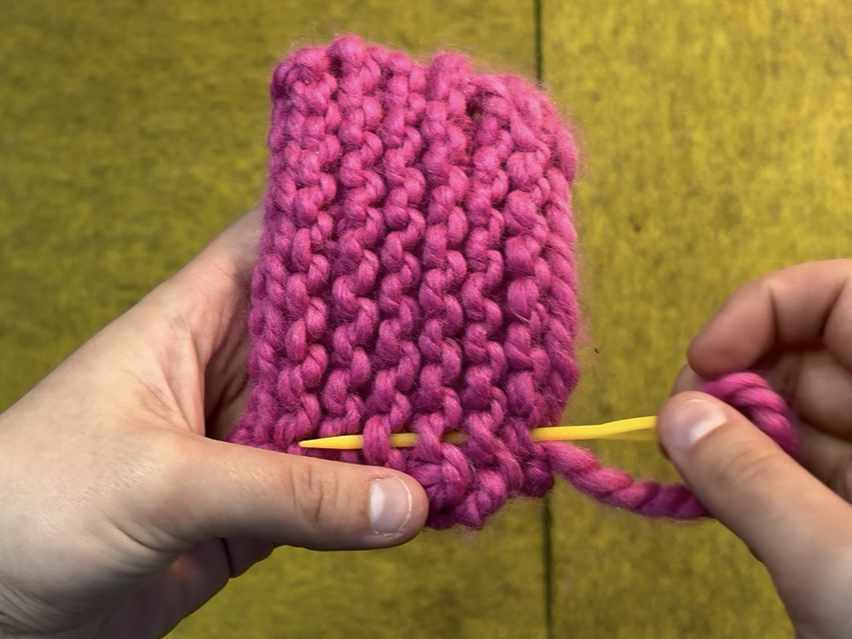
Finishing Work | Weave in Ends
- Use tapestry needle to weave in tail ends of work.
- Trim excess yarn once secure.
- Admire your finished knit swatch!
GLOSSARY
- Working Yarn: Working yarn comes directly out of your ball of yarn. Working yarn should never be confused with the cast-on tail that emerges from the beginning of your project. Keep track of which is which as you work!
- Tension: Tension is how tight or loose something is. In knitting, you control tension with your dominant hand (typically your index finger), which is holding the yarn. It is important to maintain even tension throughout your work so that each row is evenly spaced.
- Garter Stitch: Garter stitch is the cumulative stitch formed by repeated rows of knit stitch. This is the stitch reviewed in the MCD@Home video. Both sides of your project should look similar (but not identical) with an interlocking U-shape appearance.
- English Style – The most common and beginner-friendly style of knitting. In this style, working yarn is held in the right hand and wrapped or “thrown” around the dominant needle to create each stitch. All knitting shown in the MCD@Home video is done in English style.
- Continental Style: Another style of knitting that involves holding the working yarn in the left hand and catching or “scooping” the yarn with the needle tip. Left-handed knitters or those who crochet may find holding tension this way to be easier than with the right hand.
- Yarn Types: There are two types of fibers used to make yarn: natural and synthetic. Most yarns purchased from large craft stores are acrylic, which can be a much more affordable option for beginners. Natural fiber yarns are more expensive due to the amount of labor and time spent creating these yarns, but they contain lower levels of plastic (or none). There are benefits and disadvantages of using both kinds of fibers, and their unique properties make them good for different types of projects.
- Slip Knot: All knitting projects require a slip knot to cast on. This knot creates a loop that can be loosened or tightened around your knitting needle.
CREATIVE PROMPTS FOR MORE
- Use your sample square as a coaster! Use different colored threads and a tapestry needle to sew a design on it.
- Use your sample square as a trivet to protect surfaces from hot bowls or pots.
- Continue knitting on your sample square until it becomes a long rectangle. Cast off and wear your new cozy scarf!
RELATED RESOURCES
- The internet is rich with artist tutorials demonstrating a huge variety of knitting tips, techniques, and tutorials. Use the links below to expand your practice once you’ve mastered the basics!!
– Troubleshooting: fix a dropped stitch
– Purl stitch: The other fundamental stitch in knitting!
– Knitting in the round: For making hats, sweaters, and more!
– Stitch sampler: Learn cumulative stitches like stockinette, ribbing, or cables! - Feeling confident? Try your hand at the Choose Your Own Adventure Hat. Local artist Hannah Milstein authored this pattern for the a 6-week knit along course hosted at the museum.
CONNECT SOCIALLY AND LEARN MORE
![]()
![]()

Share your project! Post and tag #MCDatHome
UPCOMING EVENTS

Free First Thursdays

MakeArt Library: Portola Branch

SF Design Week Event: A Roadmap to Stardust – Design, Mythology, and the Future

