Sleek “Stained Glass” Suncatchers

Sponsored by

RECOMMENDED AGE LEVEL
Recommended for ages 5 and up with adult supervision.
PROJECT DESCRIPTION
The Object in Its Place demystifies the complex work of exhibition design, allowing visitors to explore MCD exhibition designer Ted Cohen’s tried and true approach. The concepts on display are intended to be actionable–equipping everyone everywhere with the tools and mindset to adopt Ted’s approach in their own design.
For over 60 years, Ted brought his astute eye to countless objects–leveraging light, color, and position to highlight their unique qualities. Ted was especially adept at using natural and artificial light to transform the appearance of glass objects, making them seem weightless and as if illuminated from within.
Surprisingly, glass was Ted’s least favorite material to work with. This project thus challenges participants to play with light refraction and create a stained glass light catcher in name only.
MATERIALS
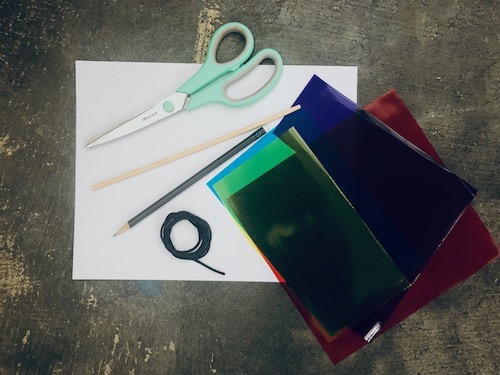
Cardstock
Scissors
Pencil
String or cord
Glue stick
Colored cellophane (See related resources for alternative materials)
OPTIONAL: Dowel or stick
OPTIONAL: Hole puncher
INSTRUCTIONS
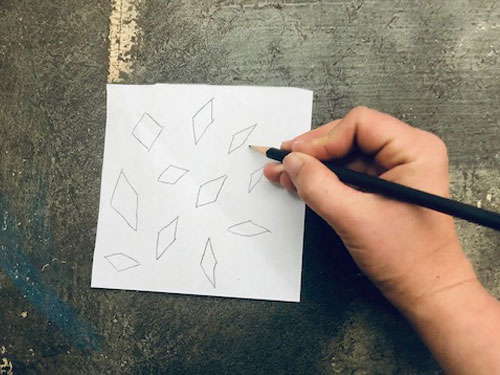
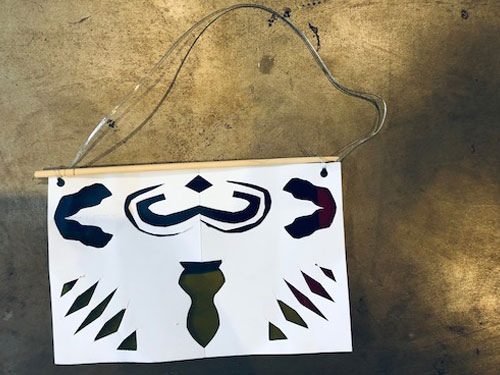
- Plan out your design using symmetrical shapes. Use a pencil to lightly draw the shapes onto the cardstock.
- TIP: Leave a border around the edge of the cardstock to prevent paper from tearing.
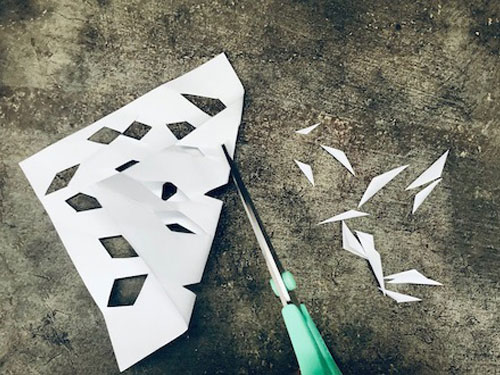
- For each shape:
- Identify the line of symmetry.
- Fold the card stock along the line of symmetry. Crease lightly.
- Starting from the crease, cut into the cardstock. Cut along the shape’s outline until it disattaches.
- Unfold the cardstock to see the resulting cut out.
- Erase any pencil markings.
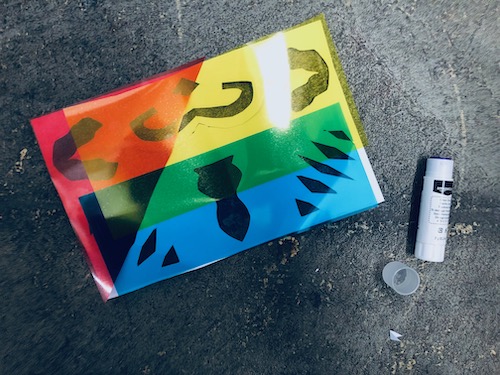
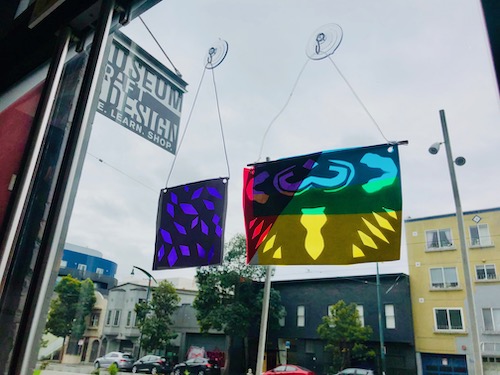
- Position cellophane to cover one side of the cardstock. Use a singular color or create a multi-color design.
- When happy with the layout, use a glue stick to adhere cellophane onto cardstock.
- Decide which side of the suncatcher will be the top. Use scissors or a hole puncher to punch a hole in the both upper corners of the design.
- Thread a length of cord through holes and carefully tie a knot around the paper and cellophane.
- OPTIONAL: Position a dowl along edge of the suncatcher and secure it in place with tape or glue.
- Suspend the suncatcher in the light and enjoy!
CREATIVE PROMPTS FOR MORE
- No cellophane? No problem. Create your own by drawing directly onto plastic wrap or sandwich bags with colored permanent markers.
- TIP: Hold plastic material in place by taping its edges onto a flat piece of cardboard while drawing.
- Decorate the remaining cardstock! Draw or add stickers to further embellish the suncatcher.
- Transform familiar items into suncatchers. Source materials with defined edges like cookie cutters and picture frames, add a cellophane into the negative space, and suspend them in the light.
- Use the same materials to make your own 3D glasses! Try this project with or without cellophane.
- Tag us in a photo with your finished product for a chance to win a FREE family membership. Drawings monthly! #MCDMakeArt
RELATED RESOURCES
- Signe Mayfield – the author of Ted’s monograph will be at MAKE on 5/19. Swing by MCD to learn more about Ted and get your book signed. Enjoy MAKE and party with a purpose!
- Read Nancy Gleaton’s article to learn more about the history of glass and suncatchers


