Natural Effects
Sponsored by
RECOMMENDED AGE LEVEL
Recommended for ages 3 and up with adult supervision.
PROJECT DESCRIPTION
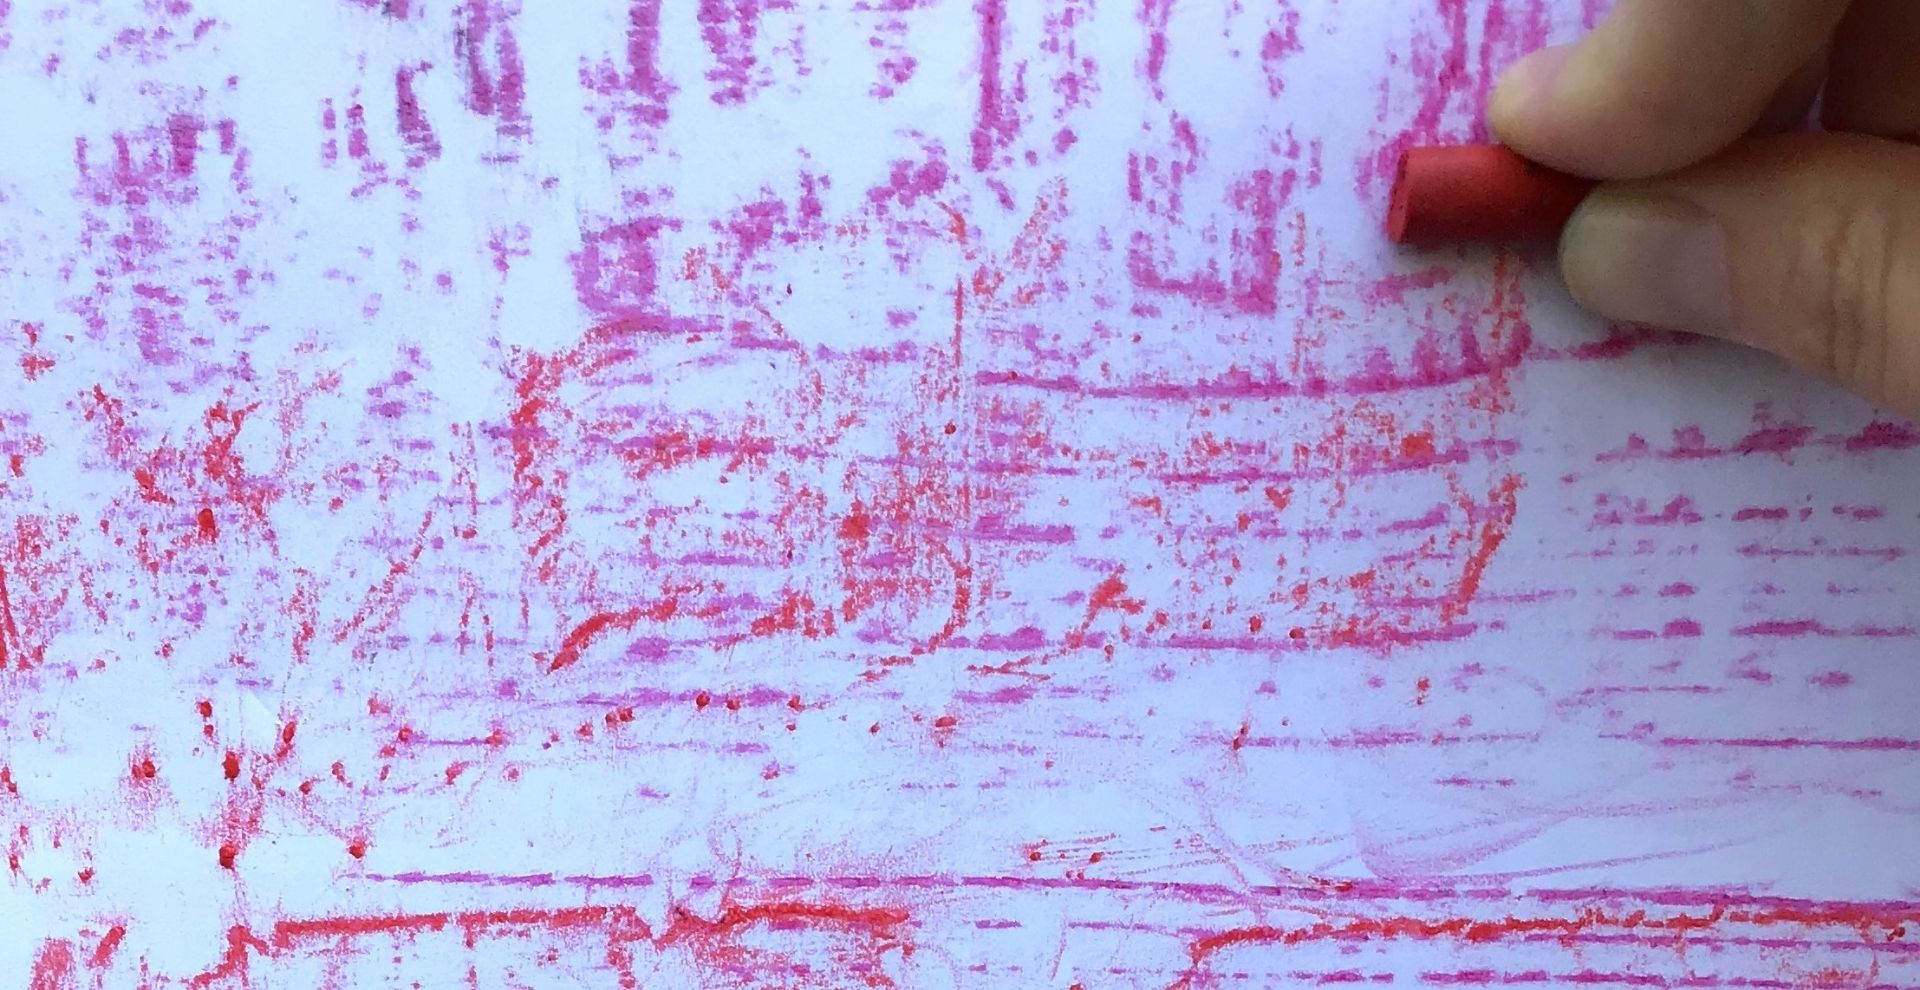
Use crayons to borrow texture directly from surfaces near your home. Bark, leaves, fences, and more can all be sources for patterns and designs.
MATERIALS
Crayons (optional: melted rainbow crayons, see instructions below)
Thin, light-colored paper (plain newsprint or printer paper works great)
OPTIONAL: scissors, glue, piece of thicker paper


INSTRUCTIONS
- Find textures by doing a short walk around your area, and gathering materials. What will translate to an interesting crayon rubbing? Look for sturdy leaves where you can clearly see the veins of the leaf, and for a variety of textures.
- Choose your crayon colors. Use melted crayons if you have them pre-prepared. If not, remove the paper wrapping from a few of your crayons so that you can use the long side for rubbings.
- Place your leaf or other material under the thin paper. Gently press down on top to hold the material in place.
- Holding your crayon on its side, press gently down and run the crayon across the area where the leaf is.
TIP: Try moving the crayon in circular motions. - Once the shape of the leaf can be seen, continue moving the crayon in smaller motions to define more details. Add in other colors to the same leaf, noticing that the leaf may move slightly. Use one leaf repeatedly, or multiple leaves on the same page.
- For outdoor textures, place your paper on the surface, and gently move the crayon over the paper. Go slowly and carefully if the texture is rough, so that the paper doesn’t rip. Don’t be afraid to let the paper bend with the surface, though!
- To create a full composition, layer multiple textures and colors on the same page. What changes with different colors and composition choices? Which textures work well as background?
- Complete an abstract or patterned composition, and experiment with more colors and shapes!
OPTIONAL: Cut out shapes from your pages, and arrange them on another piece of paper to make a collage or postcard. Glue down.
Melted Rainbow Crayons
Materials:
- Crayons
- Cupcake cups {made from either silicone, coated paper, or foil)
- Baking sheet or muffin tin
Instructions:
- Peel the paper off of your crayons.
- Break crayons into small pieces.
- Put cupcake cups into muffin tin, or set them out on a baking sheet.
- Put broken crayon pieces into cupcake cups.
- If it’s a very hot day, set the tray outside in the sun and periodically check to see the crayons melt. If the spot becomes shady, move the crayons to a sunnier spot. Bring inside once crayons are melted and allow to cool.
- OR put the tray into the oven at 230ºF for 20 minutes. Remove with oven mitt and let cool.
Remove melted rainbow crayons from the cupcake cups and use for nature rubbings!
RELATED RESOURCES
CONNECT SOCIALLY AND LEARN MORE
![]()
![]()
Share your project! Post and tag #MCDatHome
UPCOMING EVENTS

Free Summer Weekend!
July 25 - July 26
The Fabric of Celluloid: A Conversation with Dr. Alla Gadassik
August 1 @ 1:00 PM - 3:00 PM

Craft + Chat Workshop with Greg Climer
August 15 @ 1:00 PM - 3:00 PM